This 4-ingredient Irish soda bread is the kind of dense, crusty loaf my grandmother would throw together whenever we ran out of yeast but still wanted warm bread on the table. Traditional Irish soda bread relies on baking soda and acidic dairy instead of yeast, which means no kneading, no rising time, and very little fuss. You stir, shape, and bake, and in under an hour you have a golden, rustic loaf with a tight crumb and a crackly crust—perfect for spreading with butter while it’s still warm.
Serve this soda bread warm or at room temperature, sliced thick and slathered with soft salted butter, jam, or honey. It’s especially good alongside hearty soups and stews, like beef and barley or vegetable soup, where the dense crumb can soak up the broth. For breakfast, toast leftover slices and top with marmalade or sharp cheddar. It also pairs nicely with smoked salmon, a simple cheese plate, or as a base for open-faced sandwiches when you want something sturdier than standard sandwich bread.
4-Ingredient Irish Soda BreadServings: 8
Ingredients
4 cups (480 g) all-purpose flour, plus extra for dusting
1 teaspoon fine salt
1 teaspoon baking soda
1 3/4 cups (415 ml) buttermilk, cold
Directions
Preheat your oven to 425°F (220°C). Lightly flour a wooden cutting board or clean counter for shaping, and line a baking sheet with parchment paper or lightly flour it.
In a large mixing bowl, whisk together the flour, salt, and baking soda until the baking soda is evenly distributed. This helps avoid pockets of soda in the finished loaf.
Make a well in the center of the dry ingredients and pour in about three-quarters of the buttermilk. Using a wooden spoon or your hand shaped like a claw, gently mix, adding more buttermilk a little at a time just until the dough comes together in a shaggy, slightly sticky mass. You may not need every drop, or you may need a tablespoon or two extra depending on your flour.
Turn the dough out onto the lightly floured surface. With floured hands, gently bring it together and shape it into a round loaf about 6 to 7 inches across and 2 to 3 inches high. Do not knead; you’re simply coaxing it into a ball. Overworking will make the bread tough.
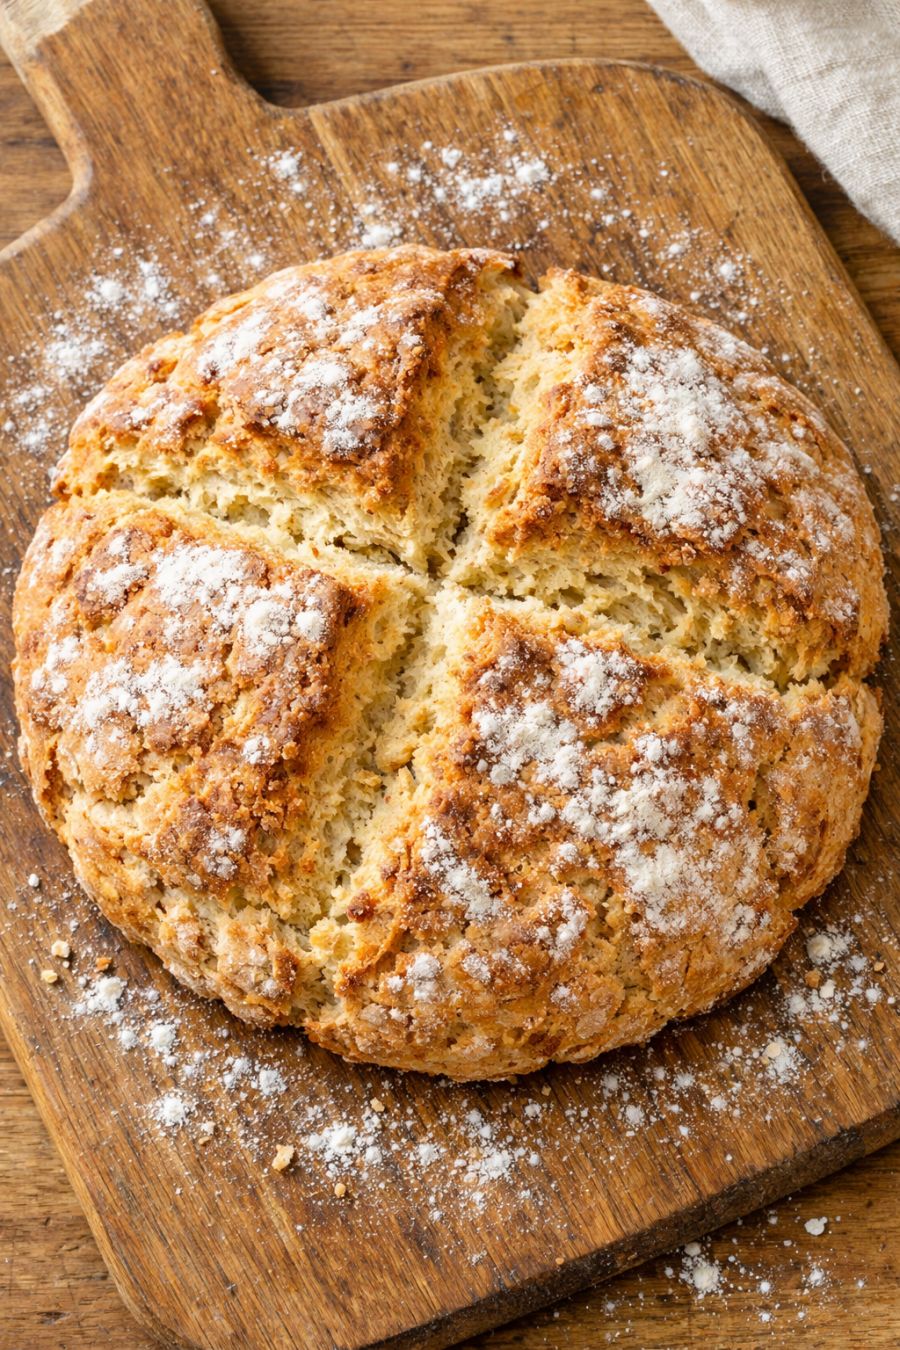
Transfer the round loaf to the prepared baking sheet. Dust the top lightly with flour, then use a sharp knife to cut a deep cross on top, about 1/2 inch to 3/4 inch deep. This helps the center cook through and gives the bread its classic look.
Bake on the center rack for 15 minutes at 425°F (220°C), then reduce the oven temperature to 400°F (200°C) without opening the door and continue baking for another 20 to 25 minutes, or until the loaf is deep golden brown and crusty. The bread should sound hollow when tapped on the bottom, and an instant-read thermometer inserted into the center should read about 200°F (93°C).
Transfer the loaf to a wooden cutting board and let it cool for at least 20 to 30 minutes before slicing. This brief rest allows the crumb to set so you get that dense, even texture instead of a gummy interior. Slice into thick wedges and serve warm or at room temperature.
Variations & Tips
For a slightly more tender crumb, you can replace up to 1 cup of the all-purpose flour with whole wheat flour; the loaf will be a bit heartier and more rustic but still dense and sliceable. If you don’t have buttermilk, make a quick substitute by stirring 1 3/4 tablespoons of white vinegar or lemon juice into 1 3/4 cups of milk, letting it sit for 5 to 10 minutes until thickened—this gives the baking soda the acidity it needs to rise. For a softer crust, wrap the hot loaf loosely in a clean kitchen towel as it cools; for an extra-crusty exterior, cool it uncovered on a wire rack. You can also shape the dough into two smaller rounds and reduce the baking time slightly, which is handy if you want one loaf for dinner and one for the freezer. Leftovers freeze well: slice, wrap tightly, and reheat slices in the toaster or a low oven to bring back the fresh-baked texture.