This is the first sweet treat my dad ever taught me to bake: simple 3-ingredient peanut butter cookies that go from bowl to oven in minutes. The recipe is a classic American shortcut that likely gained popularity in the mid-20th century when pantry baking and minimal ingredients were prized. With just peanut butter, sugar, and an egg, you get cookies that bake up with beautifully crisp, golden edges and an intensely rich, chewy center that practically melts in your mouth. It’s the kind of recipe you can memorize, make on a whim, and pass down to the next generation—just like my dad did.
Serve these cookies slightly warm so the centers stay soft and chewy, alongside a cold glass of milk, hot coffee, or black tea to balance the richness. They’re lovely on a dessert tray with fresh berries or sliced apples, which add a bit of brightness. For a simple make-ahead dessert, tuck a couple of cookies next to a scoop of vanilla or chocolate ice cream and let the residual warmth soften the ice cream around the edges. They also travel well in a tin, making them ideal for potlucks, office treats, or care packages.
3-Ingredient Peanut Butter CookiesServings: 16–20 cookies
Ingredients
1 cup creamy peanut butter (well-stirred)
1 cup granulated sugar, plus 1–2 tablespoons extra for rolling (optional)
1 large egg, at room temperature
Directions
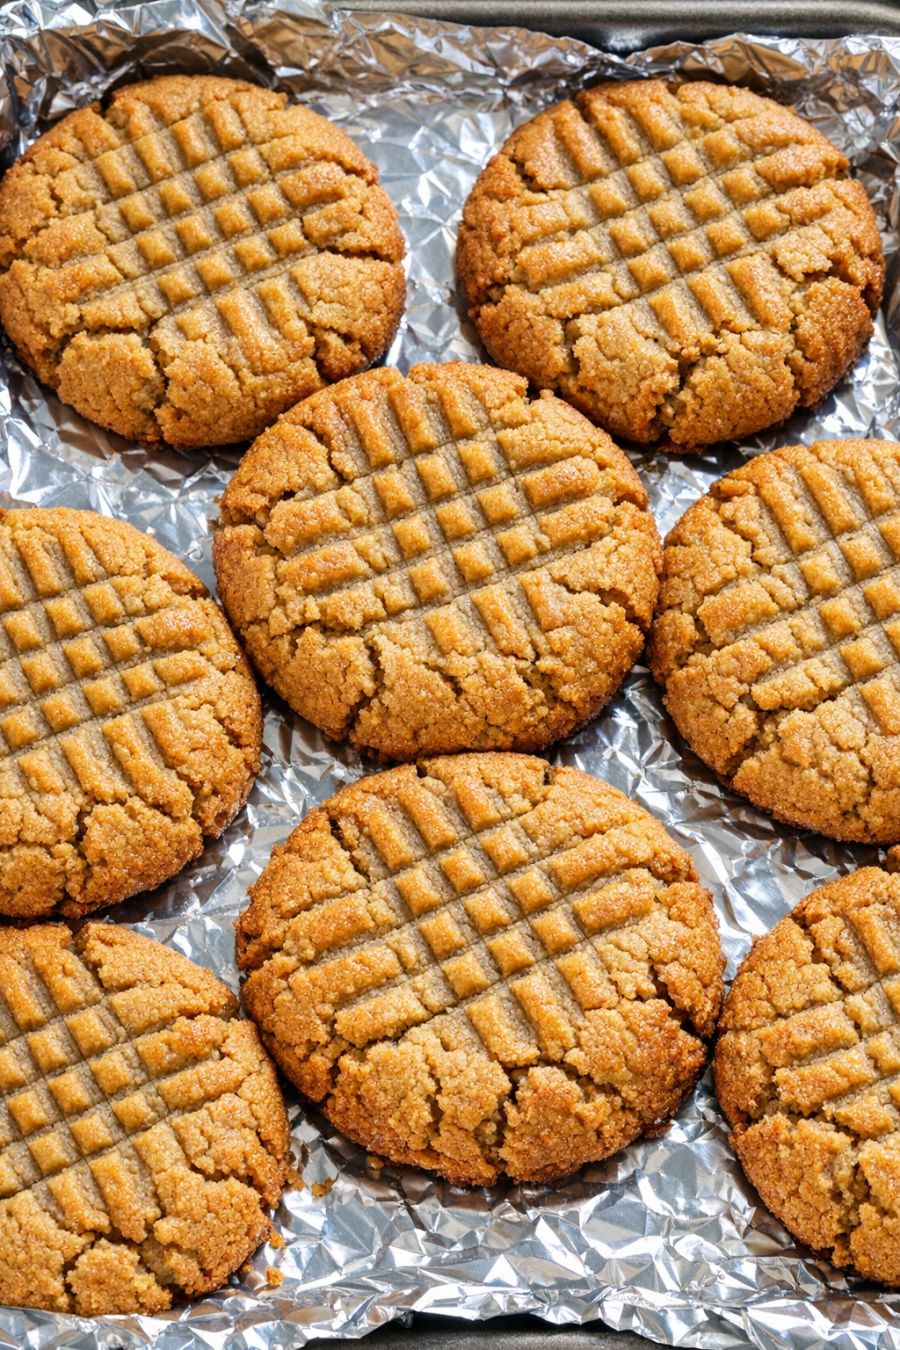
Preheat your oven to 350°F (175°C). Line a baking sheet with aluminum foil, shiny side up, and lightly grease the foil if your peanut butter tends to stick. This helps the cookies develop those crisp, golden edges while releasing easily.
In a medium mixing bowl, combine the peanut butter, 1 cup granulated sugar, and the egg. Stir with a sturdy spoon or spatula until the mixture is thick, glossy, and completely uniform with no streaks of egg. The dough will be dense but should hold together easily when pressed.
If you like a slightly crackly, crisp exterior, pour the extra 1–2 tablespoons of sugar into a small shallow bowl. Scoop out tablespoon-sized portions of dough and roll them into smooth balls between your palms. If using, roll each ball lightly in the sugar to coat.
Arrange the dough balls on the foil-lined baking sheet, spacing them about 2 inches apart to allow for slight spreading. The cookies will puff and then settle, forming chewy centers and crisp edges.
Use the back of a fork to press each dough ball down gently in one direction, then again at a 90-degree angle to create the traditional crosshatch pattern on top. Press just firmly enough to flatten the balls into thick disks; keeping them relatively thick is key to that soft, chewy center.
Bake on the center rack for 9–11 minutes, or until the cookies are set around the edges, lightly cracked on top, and a deep golden color at the rims while still looking slightly soft and underdone in the middle. They will firm up as they cool.
Remove the baking sheet from the oven and let the cookies cool on the foil for at least 5–10 minutes. This resting time helps the centers settle into a chewy texture and makes the cookies easier to lift without breaking.
Once they’ve set, carefully peel the cookies away from the foil with a thin spatula and transfer them to a wire rack to cool completely—or enjoy while still slightly warm for the most intensely rich, melt-in-your-mouth centers.
Variations & Tips
For a deeper, more complex flavor, substitute 2–3 tablespoons of the granulated sugar with light brown sugar; this will add a hint of molasses and an even chewier center. If you prefer a slightly less sweet cookie, reduce the sugar to 3/4 cup—just know the texture will be a bit softer and less crisp at the edges. Crunchy peanut butter can be used in place of creamy if you like added texture; the crosshatch pattern will be more rustic but still charming. For a subtle flavor twist that doesn’t add ingredients to the dough itself, sprinkle a tiny pinch of flaky sea salt on top of each cookie right after baking to highlight the peanut flavor. You can also make mini cookies by rolling smaller, 1-teaspoon-sized balls and reducing the bake time by a couple of minutes for bite-sized treats. To keep the centers as chewy as possible, avoid overbaking—pull them from the oven when the edges are golden and the tops are just beginning to crack, even if the centers look a bit soft. Store in an airtight container at room temperature for up to 4 days, or freeze the baked cookies for up to 2 months; thaw at room temperature to preserve their chewy texture.