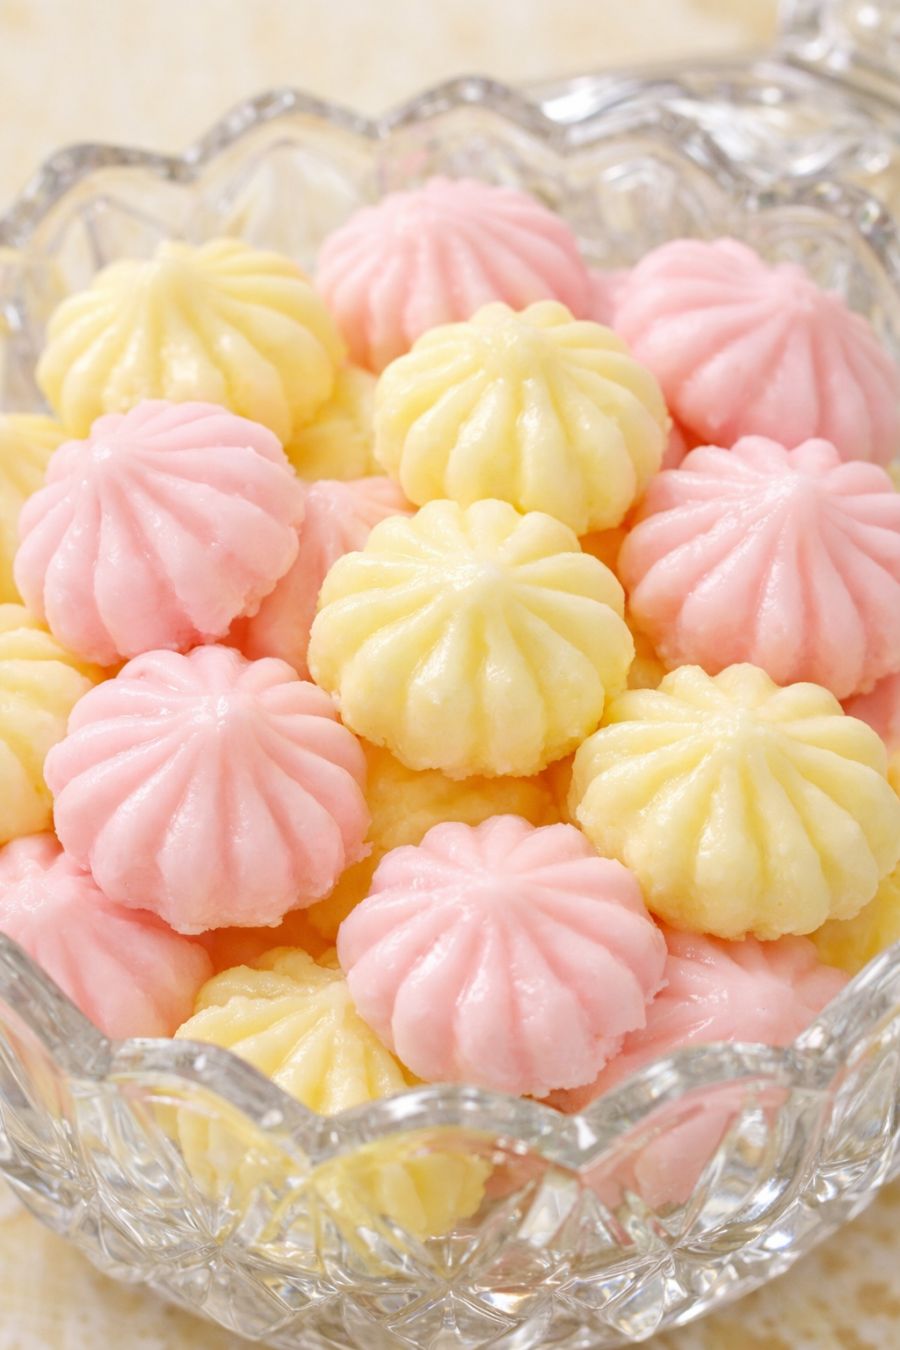
These Southern 4-ingredient cream cheese mints are straight out of my childhood. My grandmother used to set a cut-glass candy dish full of these pastel bites on the coffee table for every baby shower, wedding shower, and holiday. They’re creamy, melt-in-your-mouth, and just sweet enough—plus they only use four pantry-friendly ingredients. If you’re juggling work, kids, and everything else, this is the kind of nostalgic, no-fuss treat you can whip up the night before a gathering and feel totally put together.
Serve these cream cheese mints in a pretty glass or crystal candy dish so the soft pastel colors can really shine. They’re perfect alongside coffee or tea after a big family meal, or as a sweet little bite on a dessert table with cookies and bars. I like to set them out at baby showers, bridal showers, Easter brunch, or tuck a few into small paper candy cups for party favors. Keep a chilled plate of them in the fridge for drop-in guests—they’re just the right size when you want something sweet but not a whole slice of cake.
Southern 4-Ingredient Cream Cheese MintsServings: 40–50 small mints
Ingredients
4 oz (half of an 8 oz block) full-fat cream cheese, softened
3 cups powdered sugar, plus a little extra if needed
1/2 teaspoon peppermint extract (or to taste)
Gel food coloring in pastel yellow and pink (a few drops of each)
Directions
In a medium mixing bowl, beat the softened cream cheese with a hand mixer until completely smooth and creamy, about 1–2 minutes. Scrape down the sides of the bowl so there are no lumps.
Add the peppermint extract to the cream cheese and mix until evenly combined. Start with 1/2 teaspoon, then you can add a tiny bit more later if you like a stronger mint flavor.
Gradually add the powdered sugar, 1 cup at a time, mixing on low after each addition until it is mostly incorporated, then turning the speed up to fully blend. The mixture will go from loose to a thick, dough-like consistency. You want it soft but not sticky. If it’s still very sticky, add another tablespoon or two of powdered sugar, a little at a time.
Once the mixture is thick and smooth, divide it evenly into two small bowls. In one bowl, add a drop or two of pastel yellow gel food coloring; in the other, add a drop or two of pastel pink. Use a spoon or spatula to stir each bowl well until the color is fully mixed in. Add more color a tiny bit at a time if you want a deeper pastel shade.
Line a baking sheet or large cutting board with parchment paper. Using a small teaspoon or a 1-teaspoon cookie scoop, portion out small balls of the mint mixture, about 1 inch in diameter, placing them on the parchment. Alternate yellow and pink to mimic that pretty candy-dish look.
With the tines of a fork, the back of a small spoon, or your fingertip lightly dusted with powdered sugar, gently press each ball to flatten it slightly and create a simple pattern on top. This gives them that classic smooth, creamy look with a little texture, just like the ones you see in old-fashioned candy dishes.
Transfer the tray to the refrigerator and chill the mints for at least 1–2 hours, or until they’re firm enough to pick up easily. They’ll continue to firm up as they sit.
Once chilled, carefully transfer the mints to a glass or crystal candy dish, layering them gently so they don’t stick together. Store any extras in an airtight container in the refrigerator for up to 1 week. Let them sit at room temperature for about 10 minutes before serving so they’re perfectly soft and creamy, just like Grandma used to make.
Variations & Tips
For a slightly different flavor, swap the peppermint extract for vanilla extract or a mix of vanilla and almond extract for a wedding-cake-style mint. If you prefer a stronger mint, add extract 1/8 teaspoon at a time after tasting, since it can get overpowering quickly. You can also play with colors: soft green and white for Christmas, blue and white for baby showers, or stick with all pink for Valentine’s Day. If you own small silicone candy molds, press the mixture into them instead of rolling balls, then pop them out once chilled for pretty shapes without extra work. To make these ahead, prepare and chill the mints, then store them in layers between sheets of parchment in an airtight container in the fridge; they hold up beautifully for several days, which is ideal for busy weeks when you’re trying to get ready for a party after work.