My neighbor brought these crispy potato shingles to our church supper last spring, and I’m not kidding when I say the platter was wiped clean in minutes. They look a little fancy with all those thin, overlapping slices, but they’re really just three ingredients and a hot oven. I’ve been making them on repeat ever since for everything from casual burger nights to holiday dinners, because they’re budget-friendly, hands-off once they’re in the oven, and always a guaranteed crowd-pleaser.
Serve these crispy potato shingles straight off the baking sheet onto a simple white platter so you can really see those golden, browned edges. They’re perfect next to roast chicken, grilled steak, or baked salmon, and they make a fun swap for regular French fries with burgers. I like to put out a little dish of sour cream or Greek yogurt, some ketchup, and maybe a quick ranch or garlic aioli for dipping. For a lighter meal, pair them with a big green salad or roasted vegetables and call it dinner.
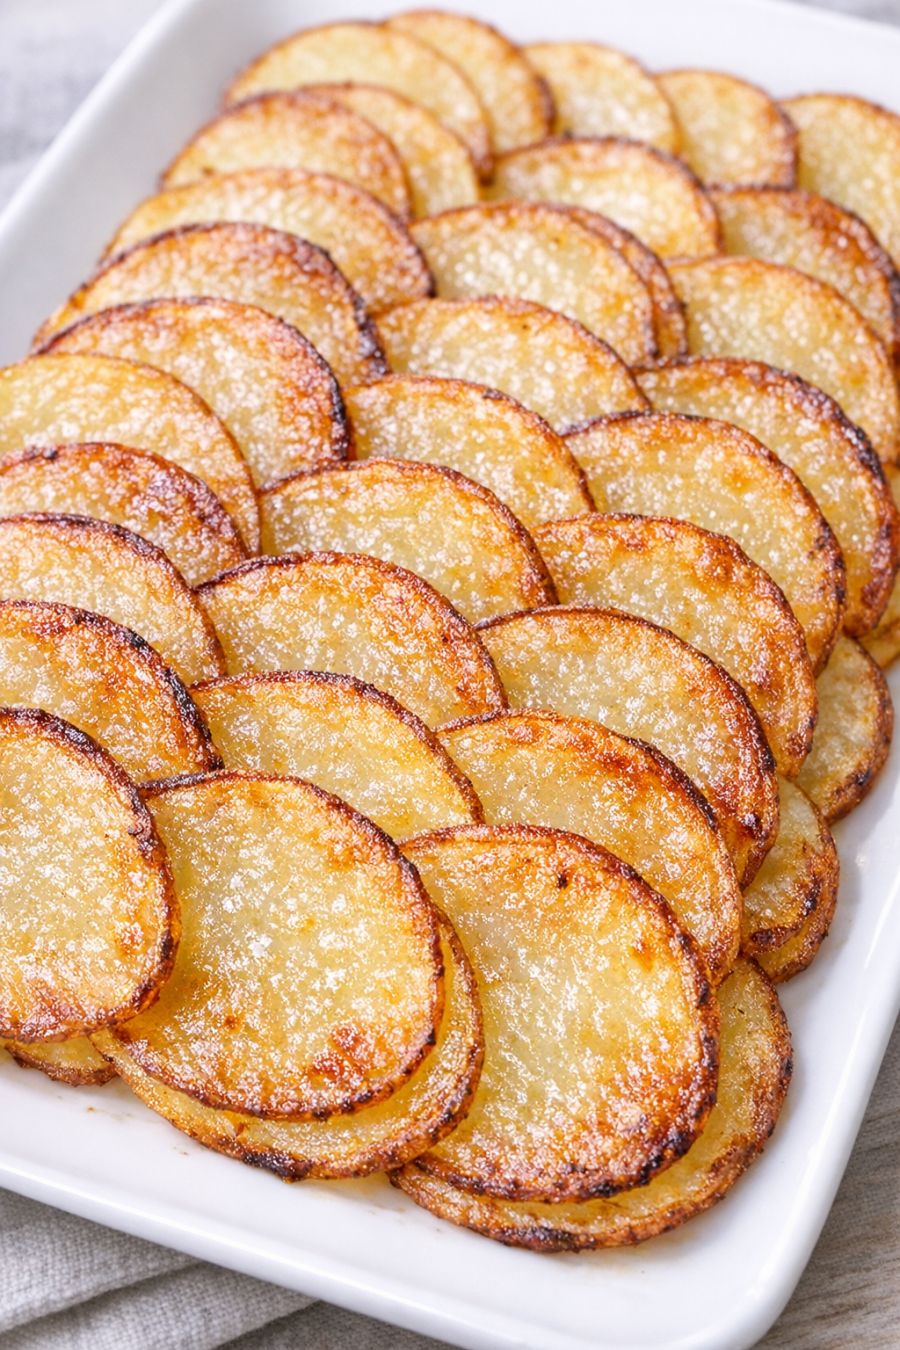
Oven-Baked 3-Ingredient Crispy Potato ShinglesServings: 4
Ingredients
2 pounds russet potatoes, scrubbed (about 4 medium)
3 tablespoons olive oil (plus a little more for the pan, if needed)
1 1/4 teaspoons kosher salt, divided
Directions
Preheat your oven to 425°F (220°C). Line a large rimmed baking sheet with parchment paper or lightly grease it with a thin film of olive oil to help prevent sticking and promote crisp edges.
Scrub the potatoes well under cool running water and pat them completely dry with a clean kitchen towel. Leave the skins on for extra texture and color; the skins help the edges get that deep golden, crispy look.
Using a mandoline set to about 1/8-inch thickness or a very sharp knife, slice the potatoes into thin rounds. Try to keep the slices as even as possible so they cook at the same rate. Discard any very tiny end pieces that might burn too quickly.
Place the potato slices in a large bowl. Drizzle with the olive oil and sprinkle with 1 teaspoon of the kosher salt. Toss gently with your hands to coat every slice lightly in oil—this is what helps them brown and crisp instead of steam.
Arrange the potato slices on the prepared baking sheet in slightly overlapping rows, like shingles on a roof. Start at one short end of the pan and lay down a row where each slice overlaps the previous slice by about one-third. Continue making shingled rows until you’ve used all the potatoes, leaving a tiny bit of space between rows so hot air can circulate.
Once the potatoes are arranged, lightly sprinkle the remaining 1/4 teaspoon salt evenly over the top of the shingled potatoes. If any slices look dry, you can brush or dab on a touch more olive oil, but avoid soaking them.
Bake on the middle rack for 25 to 30 minutes, or until the potatoes are tender in the center and the edges are deeply golden and crisp. Rotate the pan halfway through baking to ensure even browning. If the edges are browning too quickly, you can reduce the oven temperature to 400°F (200°C) for the last 5 to 10 minutes.
For extra crispiness, switch the oven to broil on high for 1 to 3 minutes at the very end, watching closely so the edges don’t burn. The goal is deep golden-brown, not blackened.
Remove the pan from the oven and let the potatoes sit for 3 to 5 minutes to firm up slightly; this makes them easier to transfer without breaking apart. Use a wide spatula to lift sections of the shingled potatoes onto a rectangular white serving platter so the overlapping pattern stays visible.
Serve immediately while hot and crispy. If you’re taking them to a potluck or church supper, loosely cover with foil for transport and re-crisp in a hot oven for a few minutes right before serving.
Variations & Tips
You can change the flavor of these potato shingles without adding more than one extra ingredient if you’d like to keep them simple. For a herby twist, sprinkle 1 teaspoon of dried rosemary or thyme over the top before baking. If your crowd loves a little kick, add 1/2 teaspoon of black pepper or smoked paprika along with the salt. To make them slightly richer, you can swap some or all of the olive oil for melted unsalted butter, but keep in mind butter can brown faster, so watch the edges closely and lower the oven temperature if needed. For a slightly lighter version, reduce the olive oil to 2 tablespoons and use parchment paper to prevent sticking; they’ll still crisp, just a bit less intensely. If you want to prep ahead, you can slice the potatoes up to 2 hours in advance and keep them submerged in cold water in the fridge, but be sure to drain them very well and pat completely dry before tossing with oil, or they’ll steam instead of crisp. Always use clean utensils and a clean cutting board, and avoid leaving sliced potatoes at room temperature in water for more than 2 hours to reduce food safety risks. Leftover potatoes should be cooled quickly, stored in an airtight container in the refrigerator, and eaten within 3 to 4 days; reheat on a baking sheet in a hot oven to bring back some of the crispiness.