This old-fashioned syrup bread is one of those humble, four-ingredient recipes that feels like a warm hug from another era. It’s inspired by Depression-era Southern cooking, when home bakers stretched every pantry staple as far as they could and still somehow turned out something cozy and comforting. There’s no eggs, no butter, and no fancy equipment—just simple ingredients that bake up into a dense, moist, lightly sweet loaf that tastes like a cross between cornbread and gingerbread (without the spices). It’s the kind of thing you can stir together after work when you’re low on groceries but still want something homemade to go with dinner or a cup of tea. If you love the idea of baking from scratch without a lot of fuss, this is one of those recipes that earns a permanent spot in the “busy weeknight, bare pantry” folder.
This syrup bread is super versatile, which is why I love keeping it in my rotation. For breakfast, slice it warm and add a little butter or a swipe of peanut butter, plus some fresh fruit or yogurt on the side. It also plays really nicely with savory meals: think a bowl of chili, a pot of beans, or a simple veggie soup—the sweetness of the bread balances anything smoky or spicy. If you’re leaning dessert, toast a slice and top it with vanilla ice cream or whipped cream and a drizzle of extra syrup. Leftovers make great snacks for the workday too; I pack a slice in my lunchbox with cheese and apple slices for a quick, no-fuss mini meal.
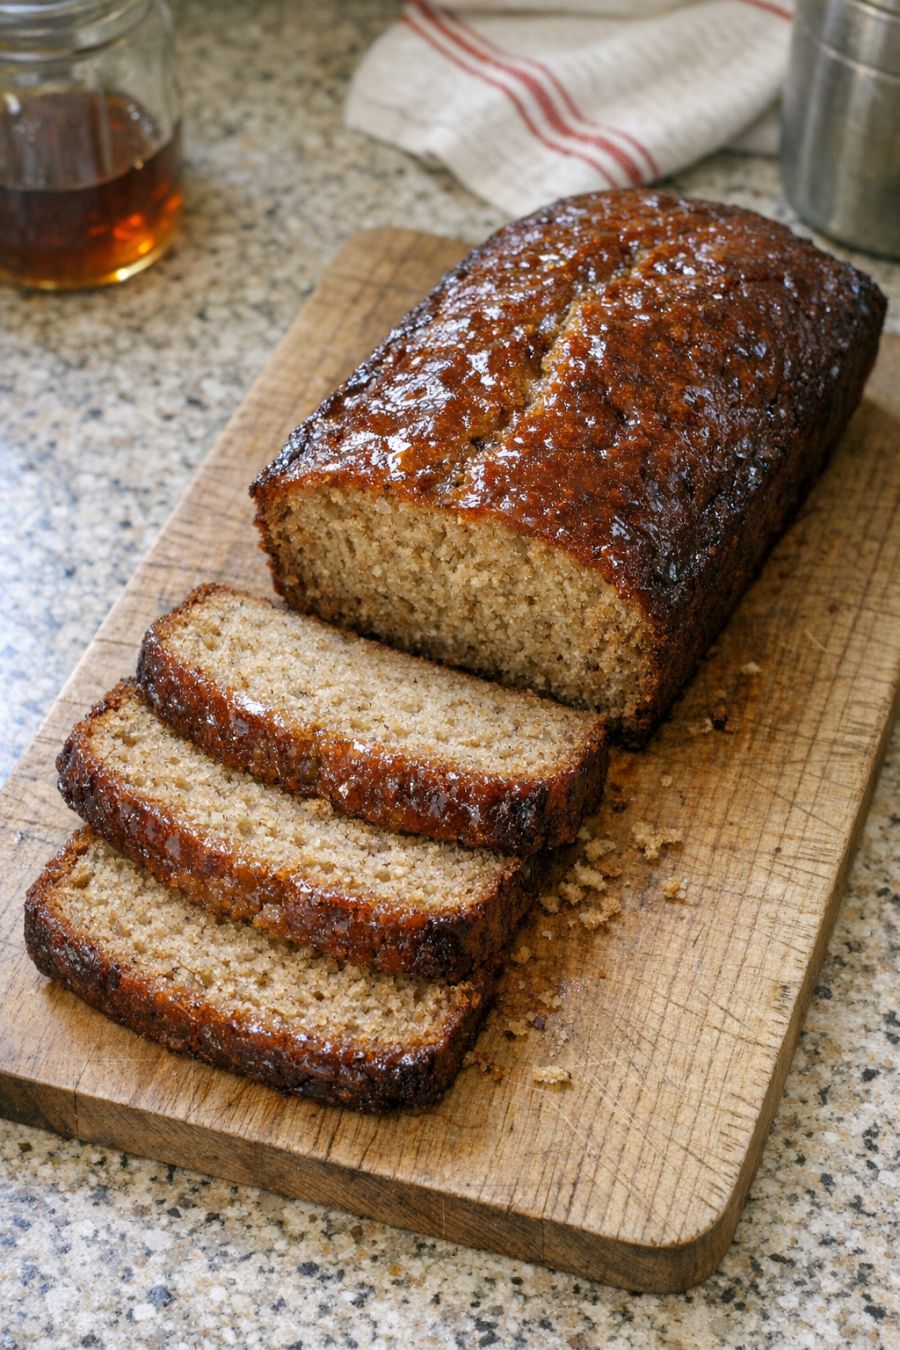
Southern 4-Ingredient Depression-Era Syrup Bread
Servings: 8 slices
Ingredients
2 cups all-purpose flour
1 cup milk (any dairy or unsweetened non-dairy milk)
1/2 cup cane syrup, sorghum syrup, or dark corn syrup
1 teaspoon baking soda
Directions
Preheat your oven to 350°F (175°C). Lightly grease a 9x5-inch loaf pan or line it with parchment for easier removal.
In a medium mixing bowl, whisk together the flour and baking soda until well combined. This helps the baking soda distribute evenly so the bread rises uniformly.
In a separate bowl or large measuring cup, stir together the milk and syrup until the syrup is mostly dissolved and the mixture looks smooth.
Pour the wet mixture into the bowl with the dry ingredients. Stir with a spoon or spatula just until everything is combined and no big streaks of flour remain. The batter will be thick but pourable; avoid overmixing so the bread stays tender.
Scrape the batter into the prepared loaf pan and spread it into an even layer, smoothing the top with the back of a spoon.
Bake for 35–45 minutes, or until the top is browned, the edges pull slightly away from the pan, and a toothpick inserted in the center comes out mostly clean (a few moist crumbs are okay).
Remove the pan from the oven and let the bread cool in the pan for about 10–15 minutes. This helps it set up so it doesn’t fall apart when you slice it.
Carefully turn the loaf out onto a wire rack or cutting board. Slice while still slightly warm for the coziest texture, or let it cool completely for neater slices. Serve plain, with butter, or however you like.
Variations & Tips
Because this recipe is so simple, it’s easy to customize based on what you have in the pantry or what you’re craving. For a heartier, more rustic loaf, swap 1 cup of the all-purpose flour for whole wheat flour; you may need to add an extra tablespoon or two of milk if the batter feels too stiff. If you prefer a stronger molasses flavor, replace part or all of the syrup with unsulphured molasses, keeping in mind it will be less sweet and more robust—great alongside beans or savory stews. You can also stir in a pinch of salt and warm spices like cinnamon or nutmeg if you want it to lean more “snack cake” than bread. For a slightly richer version, brush the warm loaf with a tablespoon of melted butter and a drizzle of syrup right after baking. To meal prep, bake the loaf on Sunday, let it cool, and store slices in an airtight container; they reheat well in the toaster or microwave for quick breakfasts and snacks throughout the week. If you’re cooking for one or two, the bread also freezes nicely: wrap individual slices and stash them in a freezer bag so you can pull out exactly what you need on busy days.
