These oven baked 3-ingredients Amish hasselback potatoes are my weeknight answer to something that feels a little special without a lot of fuss. My cousin, who married into an Amish family in rural Ohio, taught me this simple slicing method years ago. By cutting the potatoes into thin, even slices almost all the way through, you create dozens of little edges that fan out and turn crisp in the oven, while the centers stay tender. With just potatoes, butter, and salt, you get that old-fashioned, farmhouse flavor that lets the technique—and the potato itself—do all the talking.
Serve these potatoes straight from the oven on a vintage-style platter or your favorite baking dish so everyone can see the crisp, fanned slices. They’re wonderful alongside roast chicken, pork chops, or a pan-seared steak, but they’re equally at home next to a simple green salad and steamed vegetables for a lighter meal. Spoon any melted butter from the pan over the tops just before serving, and if you like, offer a small bowl of sour cream or plain yogurt at the table so people can add a cool, tangy contrast to the rich, crisp potatoes.
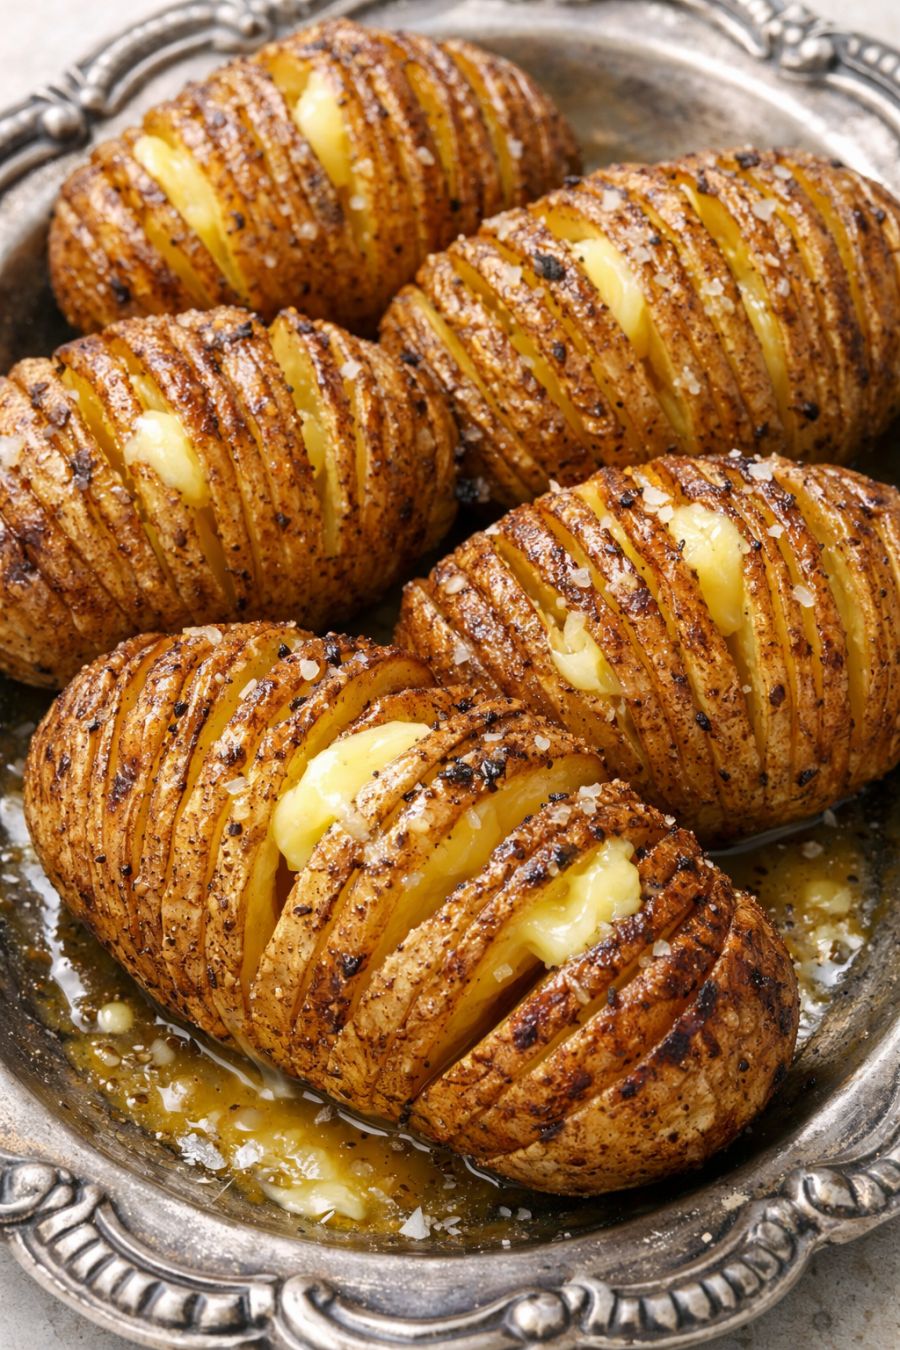
Oven Baked 3-Ingredients Amish Hasselback Potatoes
Servings: 4
Ingredients
4 medium russet or Yukon Gold potatoes, scrubbed
4 tablespoons unsalted butter, melted (plus a little extra for greasing the pan)
1 teaspoon kosher salt (plus more to taste
Directions
Preheat your oven to 425°F (220°C). Lightly grease a vintage-style baking dish or oven-safe serving platter with a small amount of melted butter so the potatoes don’t stick and the bottoms can crisp.
Prepare the potatoes: Scrub the potatoes well and pat them completely dry with a clean towel. Leave the skins on for texture and flavor—this is key to getting those crisp, rustic edges.
Use the Amish-style slicing method: Place one potato lengthwise between the handles of two wooden spoons or chopsticks on your cutting board. Starting at one end, slice the potato crosswise into very thin slices, about 1/8 inch thick, stopping when your knife hits the spoons so you don’t cut all the way through. The potato should stay in one piece, with thin, connected slices that can fan out. Repeat with the remaining potatoes.
Fan the slices gently: Using your fingers, carefully separate and fan the slices just a bit so the butter can seep down between them. Don’t worry if they don’t open perfectly; the oven heat will help them bloom as they bake.
Brush with butter and season: Arrange the sliced potatoes in the buttered baking dish, cut sides up. Brush each potato generously with melted butter, making sure to work some butter between the slices. Sprinkle the tops and sides evenly with kosher salt.
Bake until edges are crisp: Place the dish on the middle rack and bake for 30 minutes. Remove from the oven and baste the potatoes with any melted butter pooled in the dish, brushing it over the tops and into the slices.
Finish baking: Return the potatoes to the oven and continue baking for another 20–30 minutes, or until the slices are deeply golden at the tips, the edges are crisp, and the centers are tender when pierced with a knife. Total time will depend on the size of your potatoes.
Serve on the platter: Transfer the potatoes, still whole and fanned, to a vintage serving platter if they baked in a plain pan. Spoon any remaining melted butter over the tops. Taste and sprinkle with a touch more salt if needed. Serve hot so the crisp edges and soft centers are at their best.
Variations & Tips
For a slightly richer version that still respects the 3-ingredient spirit, you can swap the butter for clarified butter or ghee, which has a higher smoke point and a deeper, nuttier flavor that browns beautifully between the slices. If you want to keep the ingredients the same but change the character, try using small red potatoes instead of russets or Yukon Golds; they’ll hold their shape a bit more and give you a waxier, almost roasted-new-potato texture. To add a subtle smoky note without extra ingredients, bake the potatoes in a cast-iron skillet that you’ve used for searing meats—those leftover browned bits on the pan will mingle with the butter and season the potatoes. For advance prep, you can slice the potatoes a few hours ahead and keep them submerged in cold water in the fridge so they don’t discolor; just dry them thoroughly before buttering and salting so the edges still crisp nicely.
