These 4-ingredient Irish soda bread scones are my streamlined take on the rustic loaves my grandma baked every March. Instead of a big round of bread, I portion the dough into small, sturdy scones that freeze beautifully, so I can wrap up a whole month’s supply and stash them in the freezer. Traditional Irish soda bread relies on the simple chemistry between baking soda and acidic buttermilk for lift, which means no yeast, no long rising times, and no special equipment—just a tender, slightly tangy crumb with a crisp, flour-dusted crust. This version keeps the spirit of the original while staying practical for a busy modern kitchen.
Serve these scones warm, split and spread with salted butter, jam, or a drizzle of honey. They’re wonderful alongside a bowl of soup or beef stew, or as a simple breakfast with sharp cheddar and a cup of hot tea or coffee. Because they’re not overly sweet, they also work well as a base for open-faced sandwiches with smoked salmon, ham, or leftover corned beef during March. If you’ve frozen them, just reheat in the oven until the edges are crisp again and the centers are warm.
4-Ingredient Irish Soda Bread Scones
Servings: 15 scones
Ingredients
4 cups all-purpose flour, plus extra for dusting
1 1/2 teaspoons baking soda
1 1/2 teaspoons fine sea salt
2 cups cold buttermilk, well shaken
Raisins being optional
Directions
Line a large baking sheet with parchment paper. Cut an additional 15 small squares of parchment (just big enough to wrap each baked scone later) and set them aside for cooling and storing. Preheat the oven to 425°F (220°C) with a rack in the center.
In a large mixing bowl, whisk together the flour, baking soda, and salt until the baking soda is evenly distributed. This helps the scones rise evenly without any bitter pockets.
Make a well in the center of the dry ingredients. Pour in about three-quarters of the buttermilk and use a fork or your hand like a claw to gently toss and fold the flour into the liquid. Add more buttermilk a little at a time just until the dough comes together in a shaggy, slightly sticky mass. You may not need every drop, or you may need an extra tablespoon depending on your flour and humidity.
Turn the dough out onto a lightly floured counter. With floured hands, gently bring the dough together into a thick disk without kneading heavily—overworking will make the scones tough. Pat the dough into a rectangle about 1 inch thick.
Using a floured knife or bench scraper, cut the dough into 15 roughly equal pieces: first cut the rectangle into 3 long strips, then cut each strip into 5 squares or rectangles. Lightly dust the tops with a bit of flour if they feel sticky.
Transfer the pieces to the parchment-lined baking sheet, spacing them slightly apart so the heat can circulate. If any edges look very rough, you can nudge them into shape, but avoid pressing or compressing the dough.
Bake for 15–18 minutes, or until the scones are lightly golden on top, the bottoms are browned, and they sound hollow when tapped on the underside. If your oven has hot spots, rotate the pan once halfway through baking.
Slide the parchment with the baked scones onto a cooling rack. Let them cool for about 10 minutes, just until they’re firm enough to handle but still warm. This brief rest lets the interior set while keeping the crust crisp.
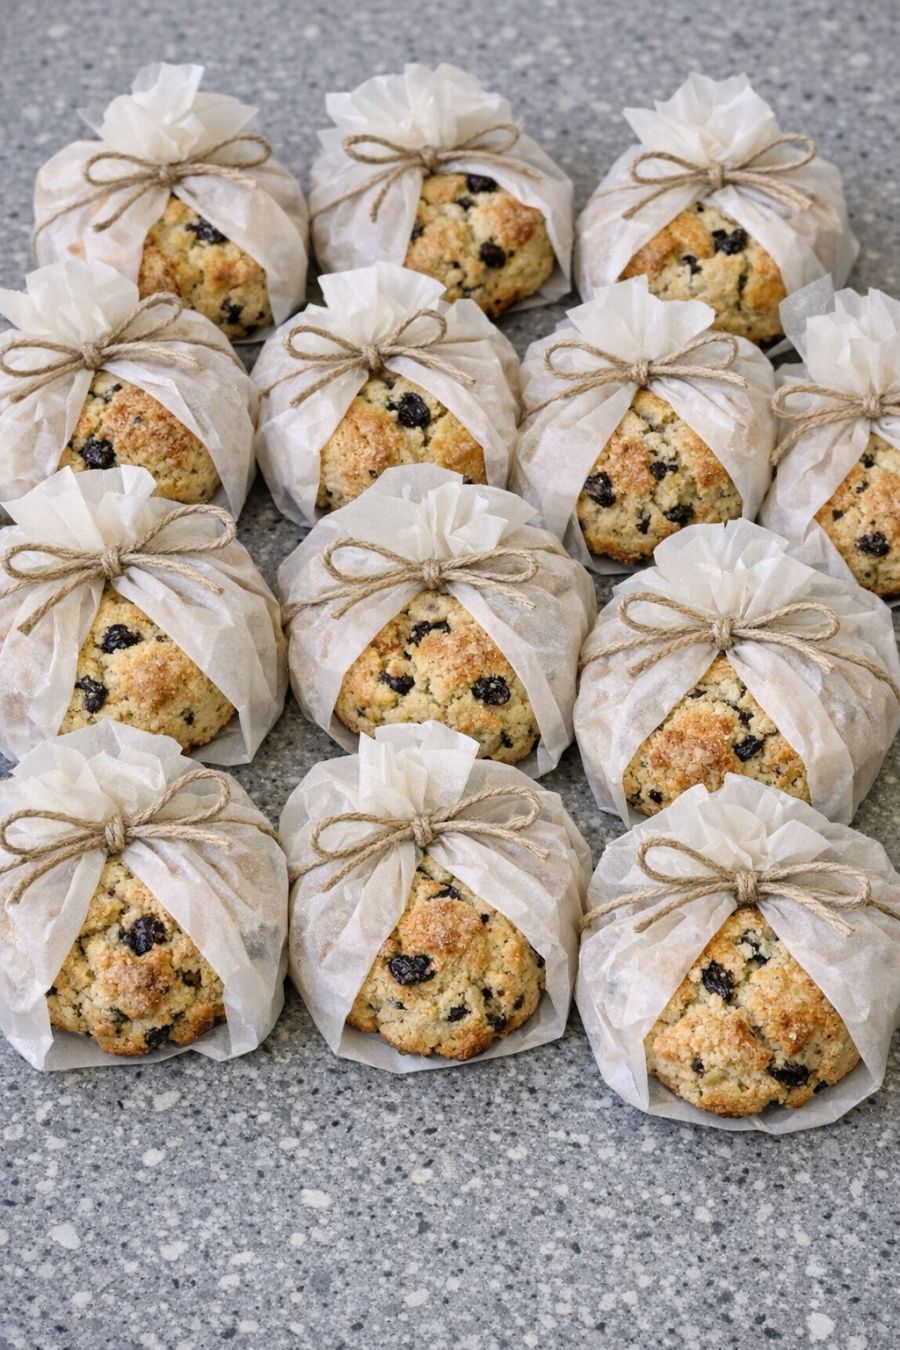
To store for the month, place each warm (not hot) scone on one of the small parchment squares and wrap it loosely, twisting the ends like a candy wrapper. Arrange the wrapped scones in a single layer on a tray and freeze until solid, then transfer to a freezer bag or container. They’ll keep well for about 1 month.
To reheat from frozen, unwrap the scones, place them on a parchment-lined baking sheet, and warm in a 350°F (175°C) oven for 10–12 minutes, or until heated through and crisp on the outside. Serve immediately for the best texture.
Variations & Tips
For a slightly heartier texture, you can swap 1 cup of the all-purpose flour for whole wheat flour, keeping the total flour at 4 cups; you may need a tablespoon or two more buttermilk. If you want a touch of sweetness without changing the ingredient count, serve the scones with honey or jam rather than adding sugar to the dough. For a more traditional Irish soda bread feel within the 4-ingredient limit, you can use coarse salt instead of fine sea salt and sprinkle a pinch on top before baking for extra crunch. If you don’t have buttermilk, make a quick substitute by stirring 2 tablespoons of white vinegar or lemon juice into just under 2 cups of milk, then letting it sit for 5–10 minutes to thicken and sour slightly (this keeps the recipe effectively at 4 core components: flour, leavening, salt, and acidic dairy). To make mini scones for snacks or kids’ lunches, cut the dough into 24 smaller pieces and reduce the baking time by a few minutes, watching closely so they don’t overbake. Finally, for a darker, crisper crust, bake on a preheated baking stone lined with parchment instead of a regular sheet pan.
