These low carb 3-ingredient peanut butter crisps are exactly the kind of thing my Nana would pull together when the pantry was nearly bare. They’re modeled after the classic old-fashioned peanut butter cookie—just peanut butter, sweetener, and an egg—but pared down and adapted to be low in carbs. The result is a sweet, crumbly little cookie with those familiar fork criss-cross marks, golden edges, and a melt-in-your-mouth texture. It’s a practical, no-fuss recipe you can lean on when you want something homemade and comforting without a long ingredient list.
Serve these peanut butter crisps with a hot cup of coffee or tea; they’re especially good for dunking since they’re tender and a bit crumbly. For a simple dessert, pair them with a small scoop of sugar-free vanilla ice cream or a dollop of lightly sweetened whipped cream. If you like contrast, set them out alongside some fresh berries—their brightness cuts through the richness of the peanut butter. They also travel well in a tin, making them handy for lunchboxes, road trips, or an easy sweet to bring to a casual get-together.
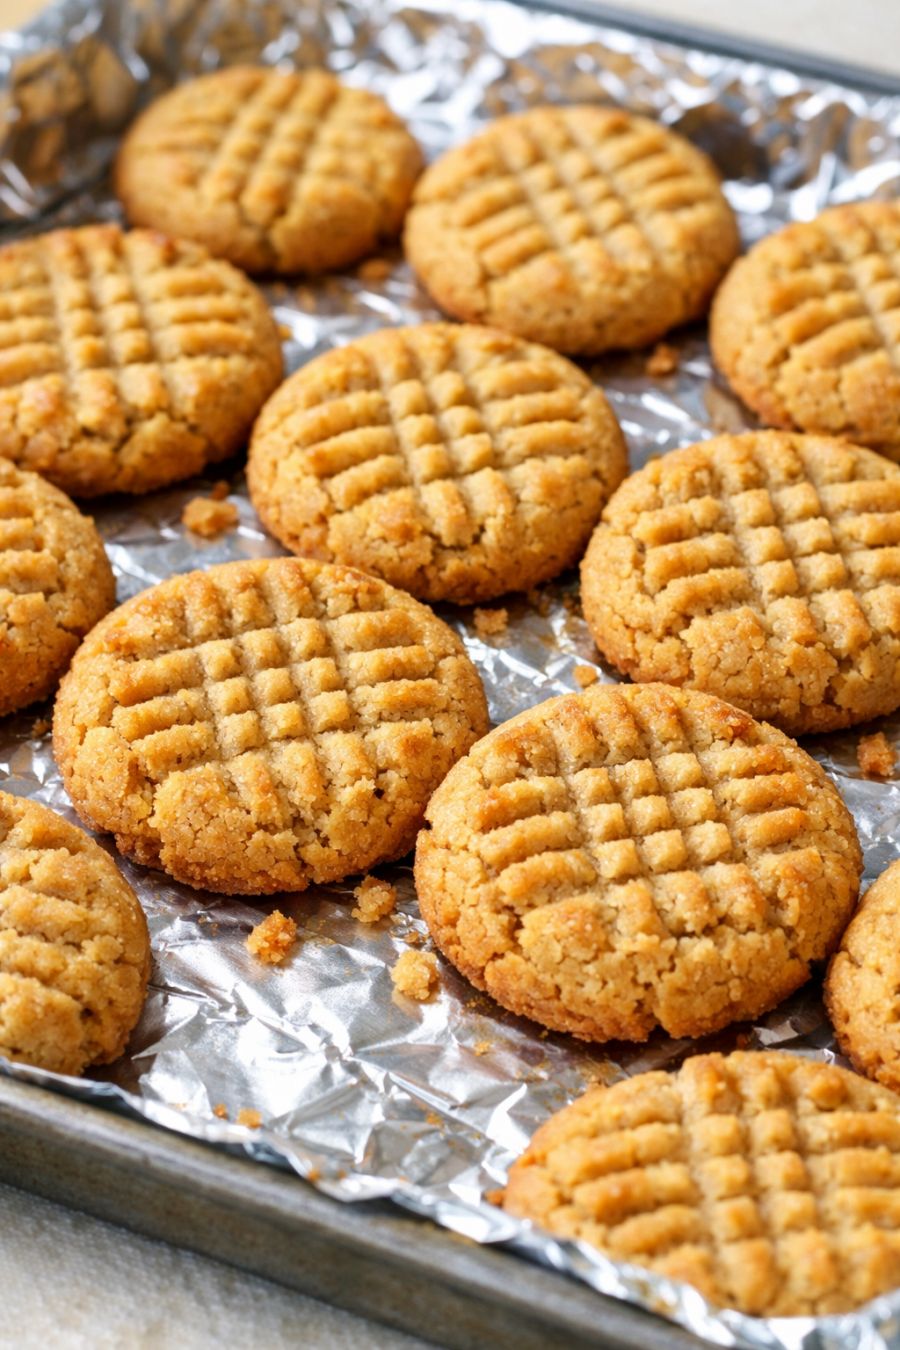
Low Carb Peanut Butter Crisps
Servings: 18
Ingredients
1 cup natural peanut butter (unsweetened, creamy or chunky)
1/2 cup granular erythritol or other low-carb granulated sweetener
1 large egg
Directions
Preheat your oven to 350°F (175°C). Line a baking sheet with aluminum foil for easy cleanup and a bit of extra crispness on the bottoms of the cookies.
In a medium mixing bowl, combine the peanut butter, granulated low-carb sweetener, and egg. Stir with a sturdy spoon or spatula until the mixture is thick, smooth, and fully blended. It will be dense, more like a soft dough than a batter.
Let the dough rest for 3–5 minutes; this helps the sweetener dissolve slightly and makes the dough a bit easier to handle.
Using a teaspoon or small cookie scoop, portion out small mounds of dough, about 1 tablespoon each, onto the foil-lined baking sheet, spacing them about 2 inches apart. You should get roughly 18 cookies.
With clean hands, gently roll each mound into a ball and place it back on the baking sheet. If the dough is sticky, lightly dampen your fingertips with water to keep it from clinging.
Using the back of a fork, press each ball down gently in one direction, then again at a 90-degree angle to create the classic criss-cross pattern. Aim for cookies about 1/2 inch thick so they stay tender but still crisp at the edges.
Bake in the preheated oven for 9–12 minutes, or until the edges are lightly golden and the tops look set. They will still feel soft in the center when you touch them; they firm up as they cool.
Remove the baking sheet from the oven and let the cookies cool on the foil for at least 10–15 minutes. They are very delicate when hot and may crumble if moved too soon.
Once the cookies have cooled and set, gently lift them from the foil with a thin spatula. Serve right away, or store in an airtight container at room temperature for up to 4 days. For a slightly firmer, crumbly texture, you can refrigerate them.
Variations & Tips
For a slightly saltier, more nostalgic flavor, use a salted natural peanut butter or add a small pinch of salt to the dough. If you prefer a softer, less crumbly texture, stir in 1–2 teaspoons of heavy cream before baking; it adds a bit of moisture without adding carbs. You can also make mini crisps by rolling smaller 2-teaspoon balls and reducing the bake time by a minute or two for bite-sized treats. For a touch of chocolate without much sugar, press a single sugar-free chocolate chip into the center of each cookie immediately after baking. If you’re sensitive to erythritol’s cooling effect, swap in a different granular low-carb sweetener blend (such as one based on allulose or monk fruit), but note that allulose tends to brown faster, so check the cookies a minute or two early. Finally, if your pantry is truly bare and you only have chunky peanut butter, go ahead and use it—the little peanut bits add extra crunch and make the crisps feel even more homemade.
