These southern 4-ingredient cheddar cheese straws are the sort of thing that never lasted long in my mother’s old tin on the counter. She’d bake a batch “just to have on hand,” and by evening there would be nothing but crumbs and a buttery scent in the kitchen. This style of cheese straw has deep roots across the South and rural Midwest—simple pantry ingredients, strong sharp cheese, and a little patience with the dough. They’re crisp, flaky, and dangerously easy to snack on, which is exactly why they were always the first thing to disappear at church potlucks and holiday gatherings.
Pile these cheese straws high on a tray for potlucks, game days, or holidays, and let folks grab them by the handful. They’re perfect alongside a bowl of tomato soup or chili, with a small plate of pickles and olives, or set out with cold beer, sweet tea, or a glass of wine before supper. They also tuck nicely next to sliced ham or turkey on a buffet, and if you’re like my family, you’ll find yourself nibbling them straight from the tin every time you walk through the kitchen.
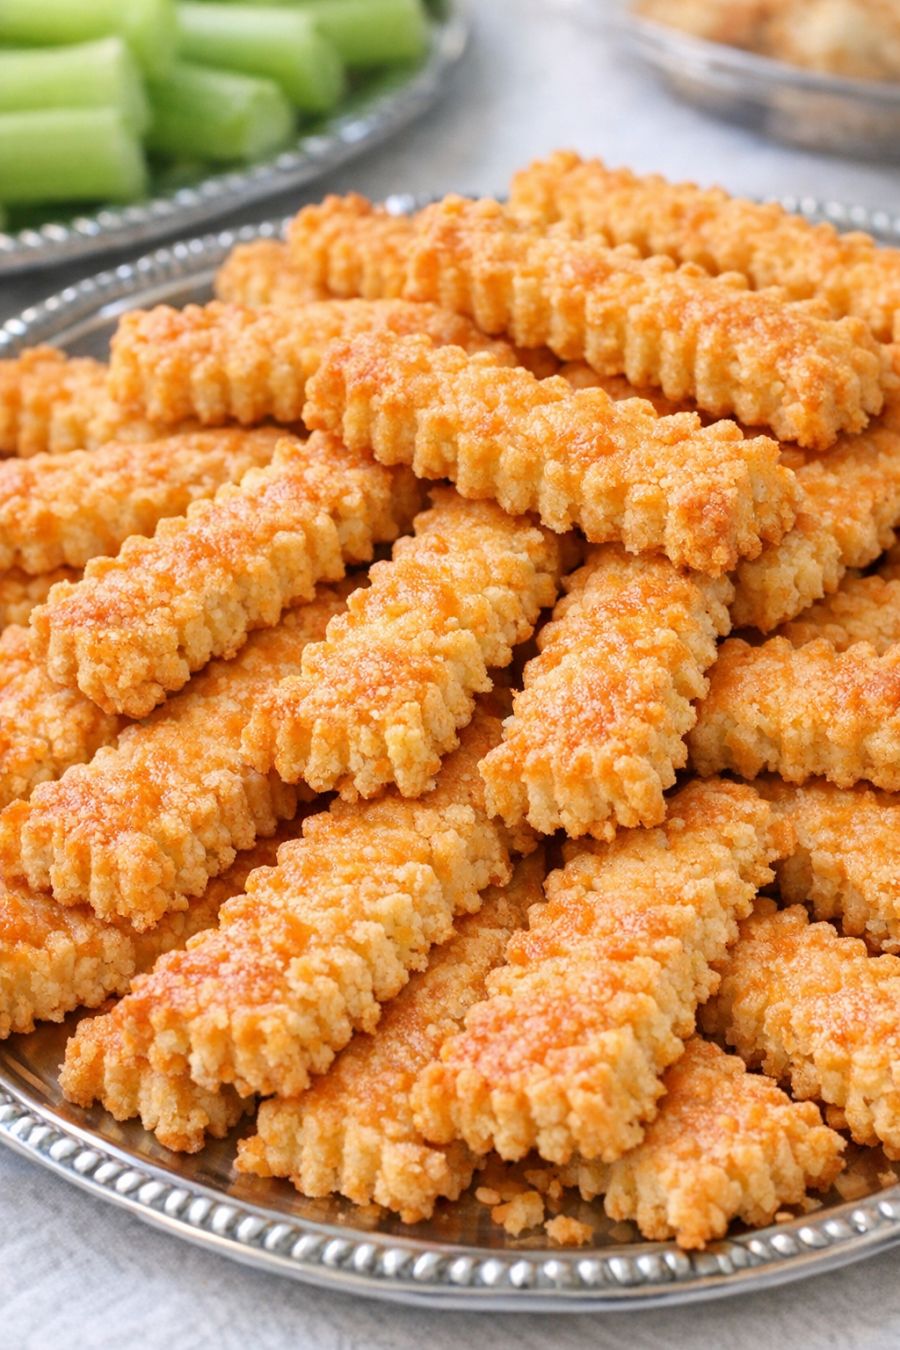
Southern 4-Ingredient Cheddar Cheese Straws
Servings: 24–30 cheese straws
Ingredients
2 cups (8 oz / 225 g) shredded extra-sharp cheddar cheese, firmly packed
1 cup (2 sticks / 8 oz / 225 g) unsalted butter, softened to room temperature
2 cups (240 g) all-purpose flour, spooned and leveled
1/2 teaspoon kosher salt (or 1/4 teaspoon fine table salt)
Directions
Grate the cheddar cheese on the small holes of a box grater if you haven’t already. It needs to be finely shredded so it blends smoothly into the dough. Let the cheese and butter sit out until they are both soft and pliable; cold ingredients make the dough harder to work with.
In a large mixing bowl, beat the softened butter with a wooden spoon or hand mixer until smooth and creamy. Add the shredded cheddar and beat or stir until the mixture is well combined and almost paste-like. It should look thick and spreadable, with no big clumps of cheese.
Sprinkle the salt over the cheese-butter mixture. Add the flour about 1/2 cup at a time, stirring gently after each addition. At first it will look dry and shaggy, but keep working the flour in until a soft dough forms. Use your hands at the end to gently knead in any loose bits of flour. The dough should be smooth and pliable, not sticky; if it feels crumbly, knead it a few more times to bring it together.
Divide the dough into two equal portions and shape each into a flat rectangle or disk. Wrap each piece in plastic wrap or cover tightly, then chill in the refrigerator for about 30 minutes. This rest helps the dough firm up so the straws hold their shape and bake up with nice flaky layers.
While the dough chills, preheat your oven to 350°F (175°C). Line two baking sheets with parchment paper or lightly grease them with a thin coat of butter. Make sure your oven racks are in the upper and lower middle positions so the straws bake evenly.
To shape with a cookie press (traditional fluted straws): Fit a cookie press with a star or ridged disk. Working with one portion of dough at a time, load the press according to the manufacturer’s directions. Press long, thin strips of dough directly onto the prepared baking sheets, about 1/2 inch wide. Use a small knife to cut them into 3- to 4-inch lengths. Leave a little space between each straw; they don’t spread much, but they need a bit of breathing room for the edges to crisp.
To shape by hand (if you don’t have a press): On a lightly floured surface, roll a portion of dough into a rough rectangle about 1/4 inch thick. Cut into narrow strips about 1/2 inch wide and 3 to 4 inches long. If you like, gently roll each strip between your palms or on the counter to round the edges slightly, then lay them on the prepared baking sheets. They won’t have the deep fluted edges of a press, but they’ll still bake up beautifully crisp.
Bake the cheese straws for 14–18 minutes, rotating the pans halfway through baking, until they are a deep golden orange with browned, crisped edges. They should smell toasty and cheesy, and the bottoms should be lightly browned. Watch closely toward the end so they don’t over-brown; every oven is a little different.
Remove the pans from the oven and let the cheese straws cool on the baking sheets for about 5 minutes to firm up. Then transfer them carefully to a wire rack to cool completely. They will crisp further as they cool, developing that flaky, buttery snap that makes them so addictive.
Once fully cooled, stack the cheese straws gently in a metal tin or airtight container, layering them with wax paper if needed. Store at room temperature for up to 5 days. In my house they never make it that long—we all find excuses to walk past that tin and “just take one more.”
Variations & Tips
For a little extra character, you can gently lean this basic 4-ingredient recipe in different directions without changing its spirit. If your family likes more bite, choose the sharpest cheddar you can find, or use a mix of extra-sharp yellow and white cheddar (still totaling 2 cups). For a more rustic look, roll the dough a touch thicker and cut wider strips; they’ll bake up a bit more tender in the center with crisp edges. If you want them extra crisp, roll or press the dough slightly thinner and bake toward the longer end of the time, watching closely so they don’t burn. You can also play with shape: twist two narrow strips together for a braided look, or cut them shorter for bite-size nibbles. For make-ahead convenience, shape the raw straws and freeze them in a single layer on a tray, then bag them once firm; bake straight from frozen, adding a minute or two to the baking time. And if your kitchen is warm and the dough gets too soft to press or cut cleanly, just pop it back into the refrigerator for 10–15 minutes to firm up before carrying on.
