This oven baked 4-ingredient depression era scalloped potatoes recipe is the kind of simple comfort food that has seen families through hard times and good times alike. My aunt still makes it exactly the way her mother did during the lean years—just potatoes, milk, onion, and a bit of fat and salt, layered in a baking dish and cooked until bubbly and golden with crispy edges. It’s humble, budget-friendly, and incredibly cozy, the kind of dish you can slide into the oven on a chilly evening and know everyone will feel taken care of when it comes out.
Serve these scalloped potatoes straight from the baking dish while they’re still bubbling and golden on top. They’re wonderful next to simple roasted or pan-fried meats, like pork chops, meatloaf, or baked chicken thighs, and they make a hearty plate when paired with steamed green beans, peas, or a basic side salad. For a meatless supper, I like to scoop them into bowls and add a side of buttered frozen veggies or sliced tomatoes in the summer. A little black pepper on top at the table and maybe some crusty bread to mop up the creamy sauce makes this feel like a full, comforting meal.
Oven Baked 4-Ingredient Depression Era Scalloped Potatoes
Servings: 6
Ingredients
2 tablespoons butter, bacon drippings, or other cooking fat, plus extra for greasing dish
2 pounds russet or Yukon Gold potatoes, peeled and thinly sliced
1 small onion, thinly sliced
2 cups whole milk (or enough to just cover the potatoes)
1 teaspoon salt (plus more to taste)
1/4 teaspoon black pepper (optional, traditional but can be omitted)
Directions
Preheat your oven to 375°F (190°C). Lightly grease an oval ceramic baking dish (about 2-quart size) with a little butter or fat, making sure to coat the bottom and sides so the potatoes don’t stick.
Peel the potatoes and slice them as thinly as you can, about 1/8 inch thick. If you have a mandoline, this is a good time to use it, but a sharp knife works just fine. Thin slices help the potatoes cook evenly and get that tender, creamy texture.
Peel the onion and slice it into very thin half-moons or rings. The onions will soften and almost melt into the sauce as they bake, adding flavor without feeling too strong.
Layer about one-third of the sliced potatoes in the bottom of the greased baking dish, spreading them into an even layer and overlapping them slightly. Sprinkle with a pinch of salt and a little pepper if using.
Scatter about half of the sliced onions evenly over the potatoes. Dot with about one-third of the butter or fat, breaking it into small pieces and tucking them here and there over the onions and potatoes.
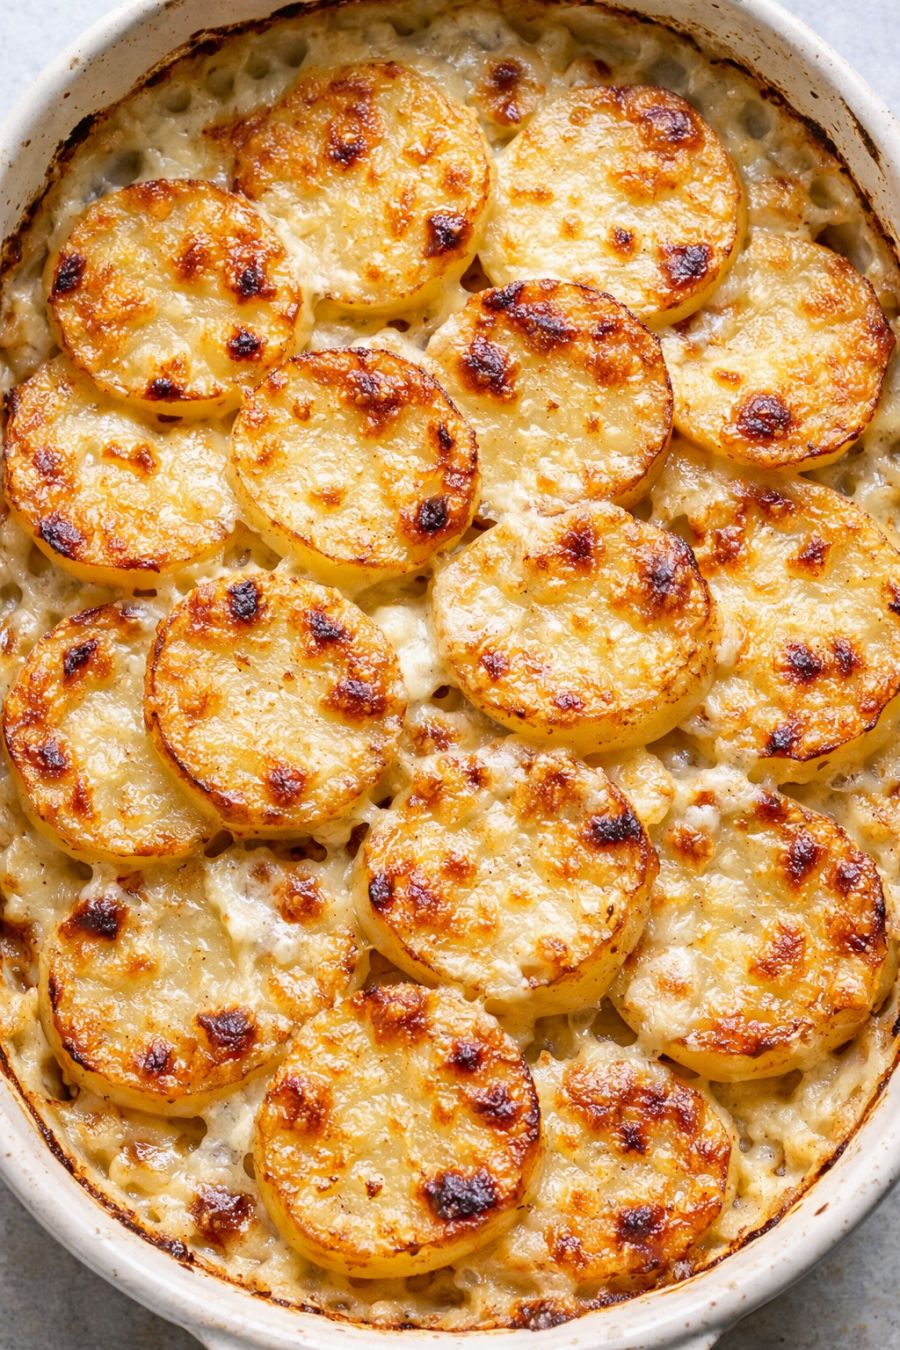
Repeat the layers: another one-third of the potatoes, a pinch of salt and pepper, the remaining onions, and another one-third of the butter or fat. Finish with the last layer of potatoes on top, a final sprinkle of salt and pepper, and dot with the remaining butter or fat. The top layer of potatoes and fat is what will brown up and get those crispy, golden edges.
Slowly pour the milk over the layered potatoes and onions. Pour near the edges and in the center, letting it seep down between the slices. You want the milk to come just up to the top layer of potatoes or just shy of it, not drowning them. If you’re short, add a splash more; if you have too much, pour a little off.
Cover the baking dish tightly with foil. Place it on a rimmed baking sheet (to catch any drips) and bake in the preheated oven for 45 minutes. This covered time helps the potatoes soften and the sauce begin to thicken without drying out the top.
After 45 minutes, carefully remove the foil and slide the dish back into the oven. Continue baking uncovered for another 30 to 40 minutes, or until the potatoes are very tender when pierced with a fork and the top is bubbly, golden, and browned around the edges. The milk will have thickened into a simple, creamy sauce between the layers.
If you’d like extra color on top, you can move the dish to the top rack for the last 5 to 10 minutes of baking, watching closely so it doesn’t burn. The edges should be nicely crisped and the center still creamy.
Remove the scalloped potatoes from the oven and let the dish rest for at least 10 to 15 minutes before serving. This short rest helps the sauce settle and thicken a bit more so you get neat, scoopable layers instead of a runny dish. Serve warm, scooping down through the layers so everyone gets some of the crispy top and creamy middle.
Variations & Tips
To keep the spirit of this depression era recipe, the base is very simple, but there are a few ways to adapt it for your family without losing that old-fashioned feel. For picky eaters who don’t love onion, you can slice the onion extra thin or grate it on the small side of a box grater so it disappears more into the sauce, or use just half an onion for a milder flavor. If someone truly won’t touch onion, you can leave it out and add a tiny pinch of garlic powder instead, though that’s more modern than traditional. If you’re working with very tight budgets, you can stretch the dish by adding one more potato and a splash of water with the milk; just be sure to season with enough salt so it doesn’t taste flat. For a bit more richness when you have it on hand, swap part of the milk for evaporated milk or stir a spoonful of sour cream into the milk before pouring it over the potatoes. To make ahead, assemble the dish earlier in the day, cover, and keep it in the fridge, then bake just before dinner, adding 10 to 15 extra minutes since it will be cold. Leftovers reheat nicely in the oven, covered, at 325°F until warmed through; if they seem dry, drizzle a tablespoon or two of milk over the top before reheating. You can also tuck in a handful of leftover ham or cooked bacon between the layers for a heartier meal, which is exactly how families used to stretch a small amount of meat to feed everyone.
