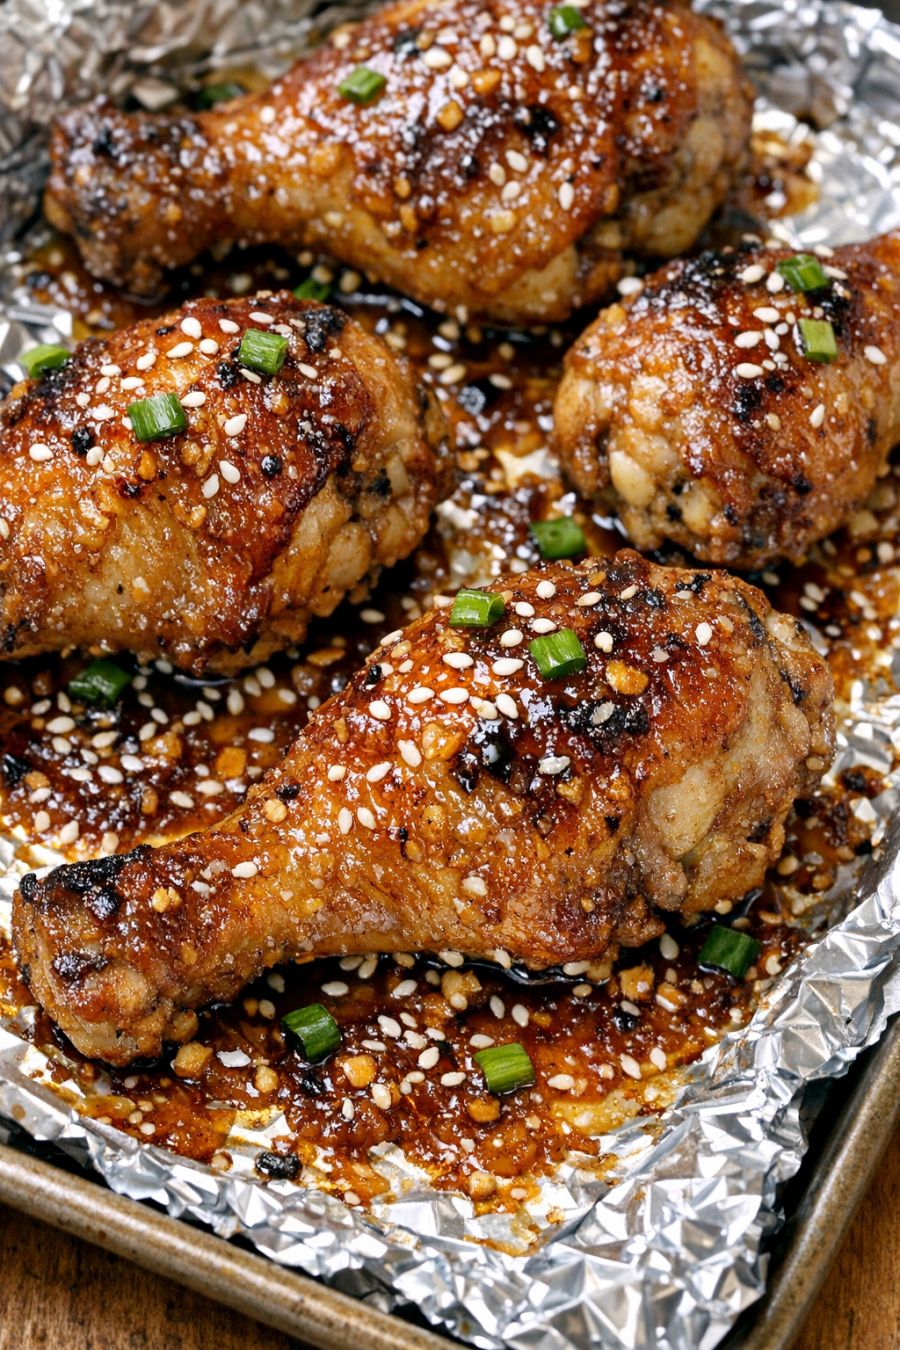
These oven baked 3-ingredient honey garlic drumsticks are the kind of recipe that quietly becomes family legend. My dad started tinkering with this combination back in the mid-90s, adjusting the oven temperature, the foil setup, and the honey-to-garlic ratio until the glaze turned out sticky, deeply caramelized, and impossible to stop eating. Thirty years later, the grandkids still hover by the stove, arguing over who gets the last piece off the baking sheet. It’s a straightforward, weeknight-friendly recipe that relies on time and heat to create that glossy, golden, honey-garlic lacquer you see in the photo—no fancy equipment, just a hot oven, a foil-lined pan, and patience.
Serve these sticky honey garlic drumsticks straight from the foil-lined pan with plenty of napkins. They’re great with simple sides that soak up the extra glaze—steamed white rice, buttered egg noodles, or roasted potatoes work especially well. A crisp green salad or steamed green beans with a squeeze of lemon balances the sweetness and richness. If you’re feeding a crowd, set them out as a main dish alongside a tray of cut vegetables and a light slaw; the sweet-savory chicken pairs nicely with something crunchy and tangy.
Oven Baked 3-Ingredient Honey Garlic Drumsticks
Servings: 4
Ingredients
3 pounds chicken drumsticks (about 10–12 pieces), patted very dry
1/2 cup honey
6 large cloves garlic, finely minced or pressed
Directions
Line a large rimmed baking sheet completely with aluminum foil, wrapping the foil up and over the edges so no pan is exposed. This helps the glaze caramelize without burning onto the pan and makes cleanup easy, a trick my dad learned early on.
Preheat the oven to 400°F (200°C). Move an oven rack to the upper-middle position so the drumsticks get enough top heat to brown and caramelize.
In a small bowl, stir together the honey and minced garlic until the garlic is evenly suspended in the honey. The mixture will be thick and sticky—that’s what you want for a clingy glaze.
Pat the chicken drumsticks very dry with paper towels. This step is important; excess moisture will steam the chicken instead of letting it brown and will thin the glaze.
Place the drumsticks in a large mixing bowl. Spoon about two-thirds of the honey-garlic mixture over the chicken. Use clean hands or tongs to coat every drumstick thoroughly, making sure some of the mixture gets under the skin folds and around the bone ends.
Arrange the coated drumsticks on the foil-lined baking sheet in a single layer, leaving a little space between each piece so the heat can circulate and the glaze can caramelize instead of just pooling.
Spoon or brush any honey-garlic mixture left in the bowl over the tops of the drumsticks. Reserve the remaining one-third of the honey-garlic mixture in the small bowl; you’ll use it partway through baking to build a thicker, stickier glaze.
Place the pan in the preheated oven and bake for 20 minutes. During this first phase, the chicken will start to render fat and the honey will loosen and pool slightly on the foil.
Remove the pan from the oven and carefully turn each drumstick with tongs. Spoon or brush half of the reserved honey-garlic mixture over the newly exposed sides of the drumsticks, letting some drip onto the foil around them.
Return the pan to the oven and bake for another 15–20 minutes. The glaze will deepen in color and start to look glossy and sticky at the edges. Keep an eye on any dark spots; honey can go from caramelized to burnt if left too long in one place.
Take the pan out again and turn the drumsticks once more. Spoon or brush the remaining honey-garlic mixture over the tops. At this point, you should see a good layer of syrupy glaze building up on both the chicken and the foil.
Bake for a final 10–15 minutes, or until the drumsticks are cooked through (the thickest part of the meat should reach 175–185°F / 80–85°C) and the glaze on the chicken and foil is deeply golden, thick, and sticky. If you like extra caramelization, you can move the pan to the top rack for the last 3–5 minutes, watching closely so the honey doesn’t scorch.
Remove the pan from the oven and let the drumsticks rest on the foil for about 5 minutes. As they sit, the bubbling glaze will thicken and cling even more tightly to the chicken, forming that signature sticky coating the grandkids fight over.
Transfer the drumsticks to a serving platter, then use a spatula or spoon to scrape up some of the caramelized honey-garlic glaze from the foil and drizzle it over the top. Serve warm, encouraging everyone to grab a piece quickly—there are never leftovers.
Variations & Tips
Because this recipe is so simple, small changes can make it feel new without losing the essence of what my dad perfected. If you want a touch of heat, add 1/4–1/2 teaspoon of crushed red pepper flakes or a pinch of cayenne to the honey-garlic mixture before coating the drumsticks. For a slightly more savory balance, sprinkle the chicken very lightly with kosher salt and black pepper before adding the honey-garlic glaze; just don’t overdo it, as the long roasting time concentrates flavors. If you prefer a bit more tang, whisk 1–2 teaspoons of apple cider vinegar or rice vinegar into the honey and garlic—this gives a gentle brightness without turning it into a different sauce. To encourage extra browning, you can start the oven at 375°F (190°C) for the first 20 minutes, then raise it to 425°F (220°C) for the final 10–15 minutes, watching closely. For easier handling at a party, use chicken drumettes and flats instead of full drumsticks, keeping the same weight and adjusting the cooking time down by about 10 minutes. Leftovers reheat well in a hot oven on fresh foil, but in my experience, the real challenge is ever having leftovers at all.
