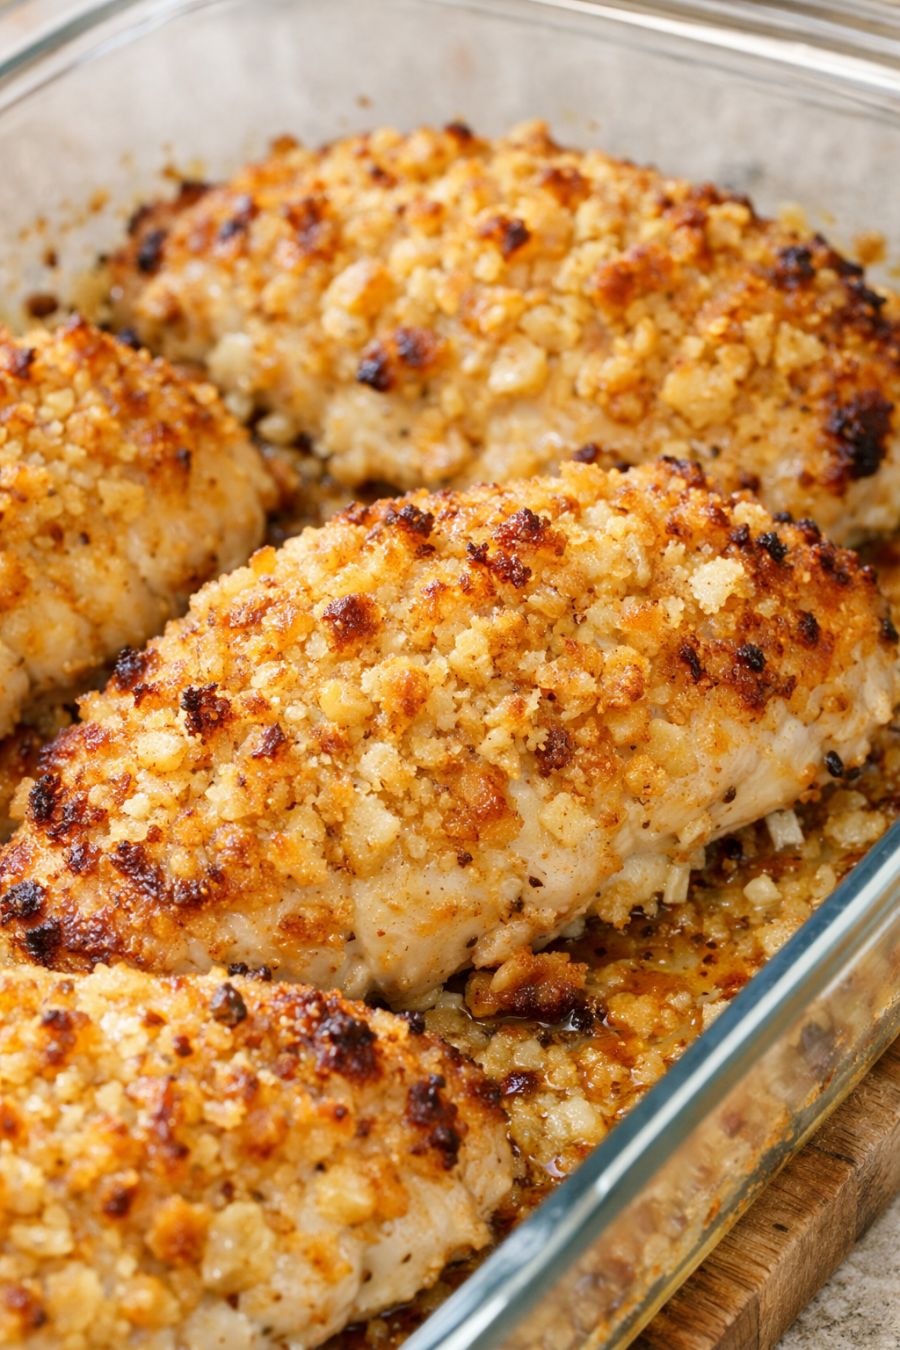
This oven baked 4-ingredient Amish saltine cracker chicken bake is the kind of no-fuss comfort food many of us grew up with. My grandmother made a version of this in her small Midwestern kitchen, and it always disappeared fast—crispy on the outside, juicy on the inside, with a buttery cracker crust that feels like home. The method is very much in the Amish farmhouse spirit: simple pantry ingredients, no fancy gear, and a straightforward bake in a glass dish that gives you beautifully browned edges and golden chicken every time.
Serve this chicken hot right out of the glass baking dish with classic, cozy sides: buttery mashed potatoes or egg noodles, green beans or sweet corn, and maybe a simple lettuce salad with a tangy vinaigrette to balance the richness. The crunchy saltine crust pairs nicely with something creamy, like coleslaw or a cucumber salad in sour cream. Leftovers (if you’re lucky enough to have any) make great sliced chicken for sandwiches on soft white bread with a smear of mayo and a few pickle chips.
Oven Baked 4-Ingredient Amish Saltine Cracker Chicken Bake
Servings: 4
Ingredients
2 pounds boneless, skinless chicken breasts (about 4 medium pieces)
1 1/2 cups finely crushed saltine crackers (about 1 sleeve)
1 cup whole milk
1/2 cup (1 stick) salted butter, melted
Directions
Preheat your oven to 375°F (190°C). Lightly grease a 9x13-inch glass baking dish with a little of the melted butter or a quick swipe of oil so the chicken doesn’t stick.
Prepare the coating: Place the saltine crackers in a zip-top bag and crush them very finely with a rolling pin or the bottom of a heavy pan. You want an even, sandy texture for a tight, crisp crust. Pour the crushed crackers into a shallow dish or pie plate.
Set up the dipping station: Pour the milk into a second shallow dish. Place it next to the dish of crushed crackers so you can work assembly-line style.
Prep the chicken: Pat the chicken breasts dry thoroughly with paper towels. This helps the milk and cracker crumbs cling and keeps the crust from slipping off while baking.
Coat the chicken: Working with one piece at a time, dip a chicken breast into the milk, turning to coat all sides, then let the excess drip off. Immediately press the chicken into the crushed saltines, coating all sides and pressing firmly so the crumbs adhere in a generous, even layer. Transfer each coated piece to the prepared glass baking dish, spacing them slightly apart.
Top with butter: Once all the chicken pieces are in the dish, drizzle the melted butter evenly over the tops and around the sides. The butter is what gives you that deep golden color and crisp, browned edges in the glass dish.
Bake the chicken: Place the baking dish on the middle rack of the preheated oven. Bake for 30–40 minutes, depending on the thickness of your chicken breasts, until the tops are golden brown and crisp and the chicken is cooked through. The internal temperature should reach 165°F (74°C) in the thickest part when checked with an instant-read thermometer.
Rest and serve: Remove the dish from the oven and let the chicken rest for 5–10 minutes. This brief rest helps keep the meat juicy and allows the crust to firm up a bit more. Spoon a little of the buttery juices from the bottom of the dish over each piece, then serve the chicken straight from the glass baking dish while it’s still hot and crisp.
Variations & Tips
For seasoning without adding extra ingredients, you can lean on technique: use salted butter and standard salted saltines, which already carry enough salt for most palates, and be sure to crush the crackers very finely for maximum surface contact and crunch. If you’re cooking for smaller appetites, you can cut the chicken breasts in half lengthwise to create thinner cutlets; just start checking for doneness around 20–25 minutes, as they’ll cook faster. To make cleanup easier and keep the crust from sticking, line the bottom of your glass dish with a very thin smear of butter rather than a heavy layer. If you want a slightly lighter version, you can trim the butter down to 6 tablespoons; the chicken will still brown, just a bit less deeply at the edges. Food safety notes: Always start with fully thawed chicken—never bake from partially frozen, as the exterior can overcook before the center reaches a safe temperature. Patting the chicken dry before coating helps the crust adhere and also reduces splattering. Use a clean cutting board and knife for the raw chicken, and wash your hands, utensils, and surfaces thoroughly with hot, soapy water before handling anything else. Discard any leftover milk and cracker crumbs that have been in contact with raw chicken rather than saving them. Finally, use a thermometer to confirm the chicken reaches 165°F (74°C) at the thickest point, and refrigerate any leftovers within 2 hours of baking.
