This oven baked 3-ingredients Amish pickle brine chicken is the kind of weeknight dinner that feels a little bit magical. A few years ago, my Amish neighbor shared her trick for unbelievably tender chicken: save your dill pickle juice and use it as a simple brine. That’s it—no fancy ingredients, no complicated steps. Just pickle brine, chicken, and a touch of butter to help the skin crisp and brown in the oven. The result is juicy, tangy, golden chicken thighs that taste like you fussed all afternoon, even though the fridge did most of the work.
Serve these tangy, juicy chicken thighs with simple sides that soak up the flavor—think buttered mashed potatoes, roasted baby potatoes, or a pan of rice made with chicken broth. A crisp green salad, steamed green beans, or roasted carrots balance the richness and add color to the plate. If you’re packing leftovers for lunch, slice the cold chicken over mixed greens with a little ranch or extra pickles on top. For a more casual dinner, tuck the meat into warm rolls with a smear of mayo and a few dill pickle slices for an easy sandwich night.
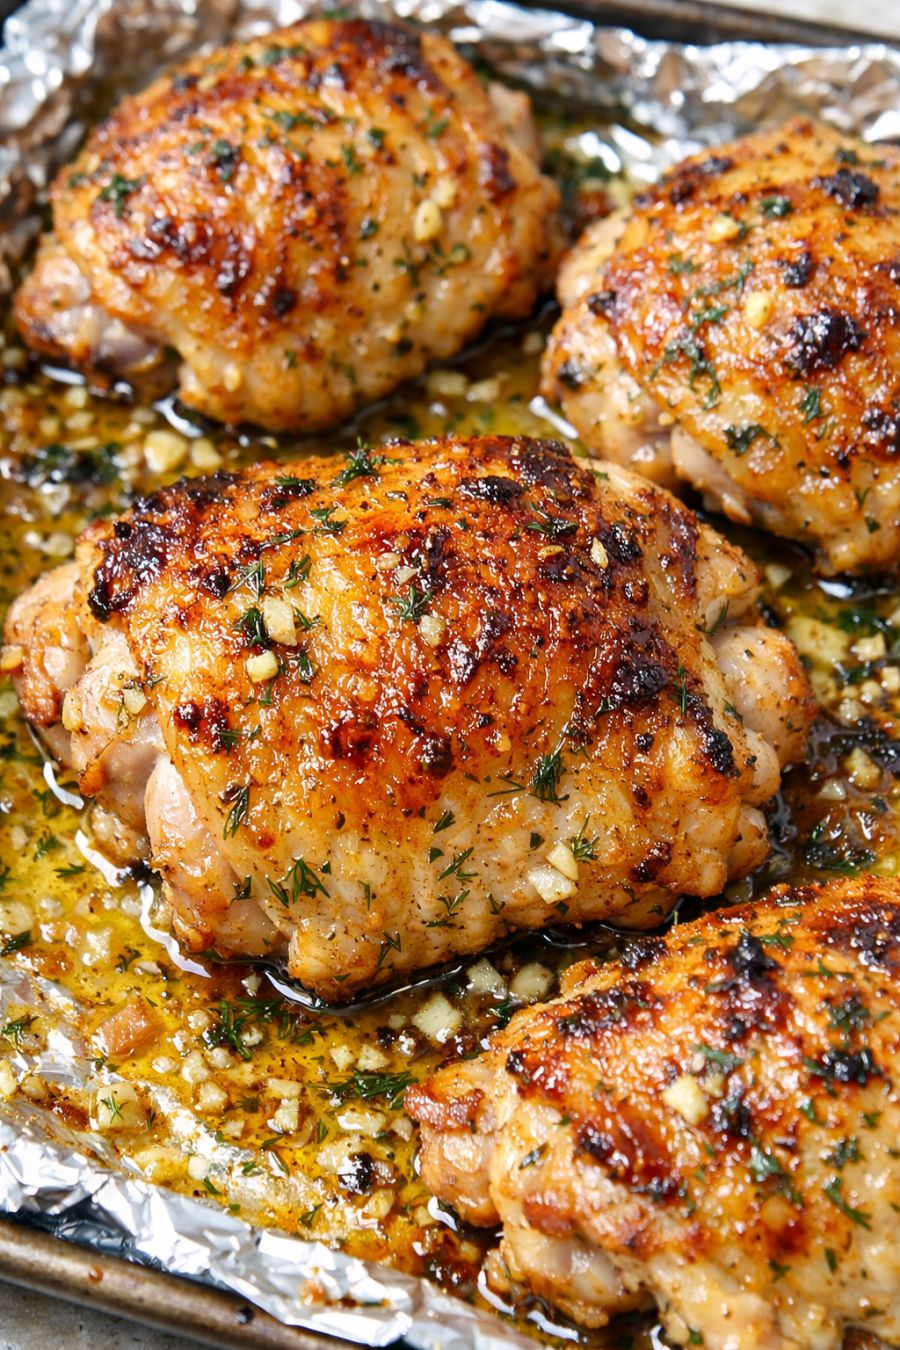
Oven Baked 3-Ingredients Amish Pickle Brine Chicken
Servings: 4
Ingredients
2 pounds bone-in, skin-on chicken thighs (about 6–8 thighs)
2 cups dill pickle brine (juice from a jar of dill pickles, with garlic and dill if possible)
2 tablespoons unsalted butter, melted (or very soft)
Directions
Pat the chicken thighs dry with paper towels to remove excess moisture so the brine can soak in better and the skin can crisp later.
Place the chicken thighs in a large glass or plastic container or a zip-top bag, skin side up if they are in a single layer.
Pour the dill pickle brine over the chicken until the pieces are mostly submerged. If needed, gently press the chicken down so the brine covers as much surface as possible.
Cover the container (or seal the bag, pressing out extra air) and refrigerate for at least 4 hours and up to 12 hours. For the most tender, flavorful meat, aim for 8 hours. Do not exceed 24 hours, as the brine can make the texture too soft.
When you’re ready to cook, preheat your oven to 400°F (200°C). Line a rimmed baking sheet with aluminum foil for easy cleanup, then place a metal rack on top if you have one. If you don’t have a rack, you can place the chicken directly on the foil-lined sheet.
Remove the chicken thighs from the brine and discard the used brine; do not reuse it. Pat the chicken very dry with paper towels—this step is important for getting that golden, crispy skin.
Arrange the chicken thighs on the prepared baking sheet, skin side up, leaving a little space between each piece so air can circulate and the skin can crisp.
Brush the tops of the chicken thighs lightly and evenly with the melted butter, focusing on the skin. This helps the skin turn golden and encourages crispiness in the oven.
Place the baking sheet on the middle rack of the preheated oven. Bake for 35–45 minutes, depending on the size of the thighs, until the skin is deep golden and crispy and the internal temperature reaches 165°F (74°C) when checked with an instant-read thermometer in the thickest part (not touching the bone).
If the chicken is cooked through but you’d like the skin a bit more browned, move the pan to the top rack and broil on high for 1–3 minutes, watching closely so it doesn’t burn.
Remove the chicken from the oven and let it rest on the pan for 5–10 minutes. This helps the juices settle so the meat stays extra tender and moist when you cut into it.
Serve the chicken hot right from the foil-lined baking sheet or transfer to a platter, spooning any pan juices over the top for extra flavor.
Variations & Tips
You can tweak this simple three-ingredient Amish-style method to fit your weeknight routine while still keeping it easy. If you prefer white meat, use bone-in, skin-on chicken breasts or drumsticks; just adjust the baking time (breasts may need closer to 30–35 minutes, drumsticks around 35–45 minutes). If your pickle brine is very salty, you can dilute it with a few tablespoons of water before brining or shorten the brine time to 4–6 hours. For extra tang, choose a garlicky dill or kosher dill brine with lots of dill and garlic in the jar. If you like a little kick, use a spicy dill pickle brine or add a pinch of red pepper flakes to the brine (still keeping the count at three ingredients by choosing a spicy pickle jar from the start). For meal prep, you can brine the chicken the night before, then bake after work and store leftovers in the fridge for up to 3–4 days; reheat in a 350°F oven until warmed through to help the skin re-crisp. Food safety tips: Always marinate raw chicken in the refrigerator, never on the counter. Use a non-reactive container (glass, ceramic, or food-safe plastic) and discard the used pickle brine after marinating—do not reuse it or serve it as a sauce since it has been in contact with raw poultry. Make sure the chicken reaches an internal temperature of 165°F (74°C) in the thickest part for safe eating. Wash your hands, cutting boards, and any utensils that touched the raw chicken or brine with hot, soapy water to avoid cross-contamination.
