This southern 4-ingredient lemon icebox pie is the very one my grandma set on the farmhouse table every spring, right when the daffodils started popping up along the fence line. It’s the kind of pie that disappears slice by slice while folks are still standing around the kitchen, forks in hand, pretending they’re just going to have a taste. No one ever believes it only takes four simple ingredients, but that’s the beauty of old-fashioned recipes: they rely on time, patience, and a cool fridge instead of a long shopping list. This pie has its roots in those practical Midwestern and Southern kitchens where canned milk and pantry staples met fresh citrus, and a good dessert was often stirred together in one bowl after church or before company came calling.
Serve this lemon icebox pie well chilled, straight from the refrigerator, with the filling set and the graham cracker crust just a little bit crumbly. It’s lovely on its own, but it shines after a simple supper like baked chicken and green beans or a backyard cookout with burgers and corn on the cob. A fresh pot of coffee or a tall glass of sweet tea makes a fine companion, and if you want to dress it up just a touch, add a few thin lemon slices on the side of each plate. This is a pie meant for passing around a crowded table, with everyone angling for that last, cool, sunny-tasting slice.
Southern 4-Ingredient Lemon Icebox Pie
Servings: 8
Ingredients
1 1/2 cups graham cracker crumbs
1/3 cup unsalted butter, melted
2 cans (14 ounces each) sweetened condensed milk
3/4 cup freshly squeezed lemon juice (from about 4–5 lemons)
Directions
Prepare the crust: In a medium bowl, stir together the graham cracker crumbs and melted butter until all the crumbs are evenly moistened and the mixture looks like damp sand.
Press into the pie dish: Pour the crumb mixture into a 9-inch glass pie dish. Using your fingers or the bottom of a measuring cup, press the crumbs firmly and evenly across the bottom and up the sides of the dish to form a crust. Pack it in well so it holds together.
Chill the crust: Place the crust in the refrigerator to chill and firm up while you mix the filling. This helps the crust stay together when you slice the pie.
Mix the filling: In a large bowl, pour in the sweetened condensed milk. Slowly whisk in the freshly squeezed lemon juice, a little at a time, until the mixture is smooth, thick, and creamy. It will start to thicken as the lemon juice reacts with the milk.
Fill the crust: Take the chilled graham cracker crust out of the refrigerator. Pour the lemon filling into the crust and smooth the top with a spatula so it’s even from edge to edge.
Chill to set: Cover the pie loosely with plastic wrap or foil, being careful not to touch the surface of the filling. Refrigerate for at least 4 hours, or overnight if you can, until the filling is fully set and firm enough to slice cleanly.
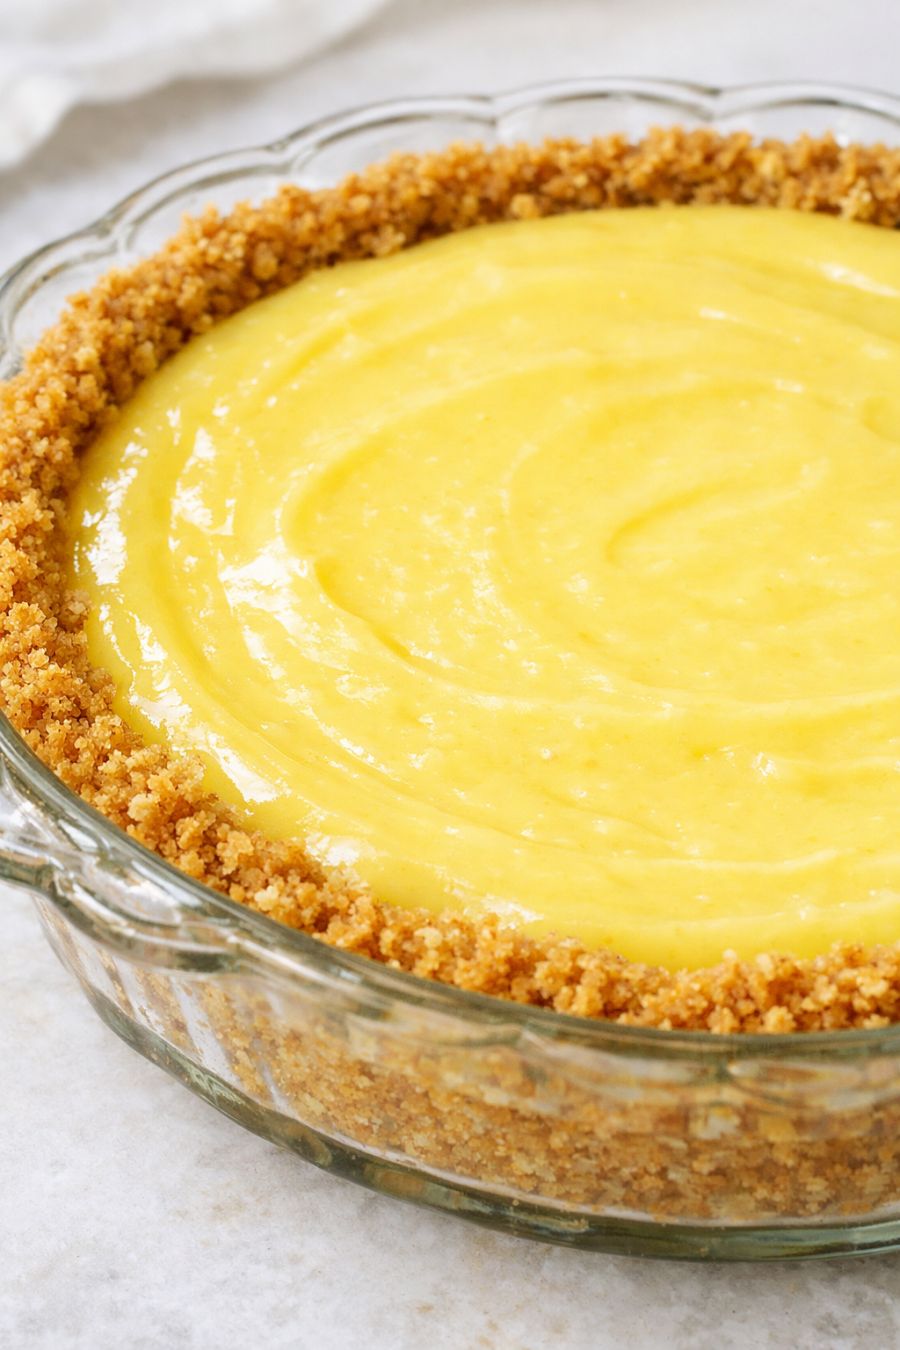
Serve: When you’re ready to serve, remove the pie from the refrigerator. For the neatest slices, dip a sharp knife in warm water and wipe it dry between cuts. Serve the pie well chilled, straight from the glass dish, admiring that bright yellow creamy filling and golden crumbly crust.
Variations & Tips
For a slightly sweeter, milder pie, you can reduce the lemon juice to 2/3 cup; for a sharper, more puckery pie, add an extra tablespoon or two of lemon juice, tasting as you go. If you don’t have fresh lemons, bottled lemon juice will work in a pinch, though fresh gives the brightest flavor. You can also swap in a store-bought graham cracker crust to save time, though the homemade crust has a more rustic, buttery charm. For a bit of texture, sprinkle a few extra graham cracker crumbs over the top just before serving. If you like a touch of garnish without adding another true ingredient, you can decorate the top with very thin slices or twists of lemon, using only the lemons you’ve already juiced. Food safety tip: Always keep this pie refrigerated, as the filling is dairy-based. Store leftovers tightly covered in the refrigerator and enjoy within 3–4 days. Do not leave the pie out at room temperature for more than 2 hours, especially in warm weather. If you make it ahead, be sure it is fully chilled and set before slicing so it holds together and stays safe to eat.
