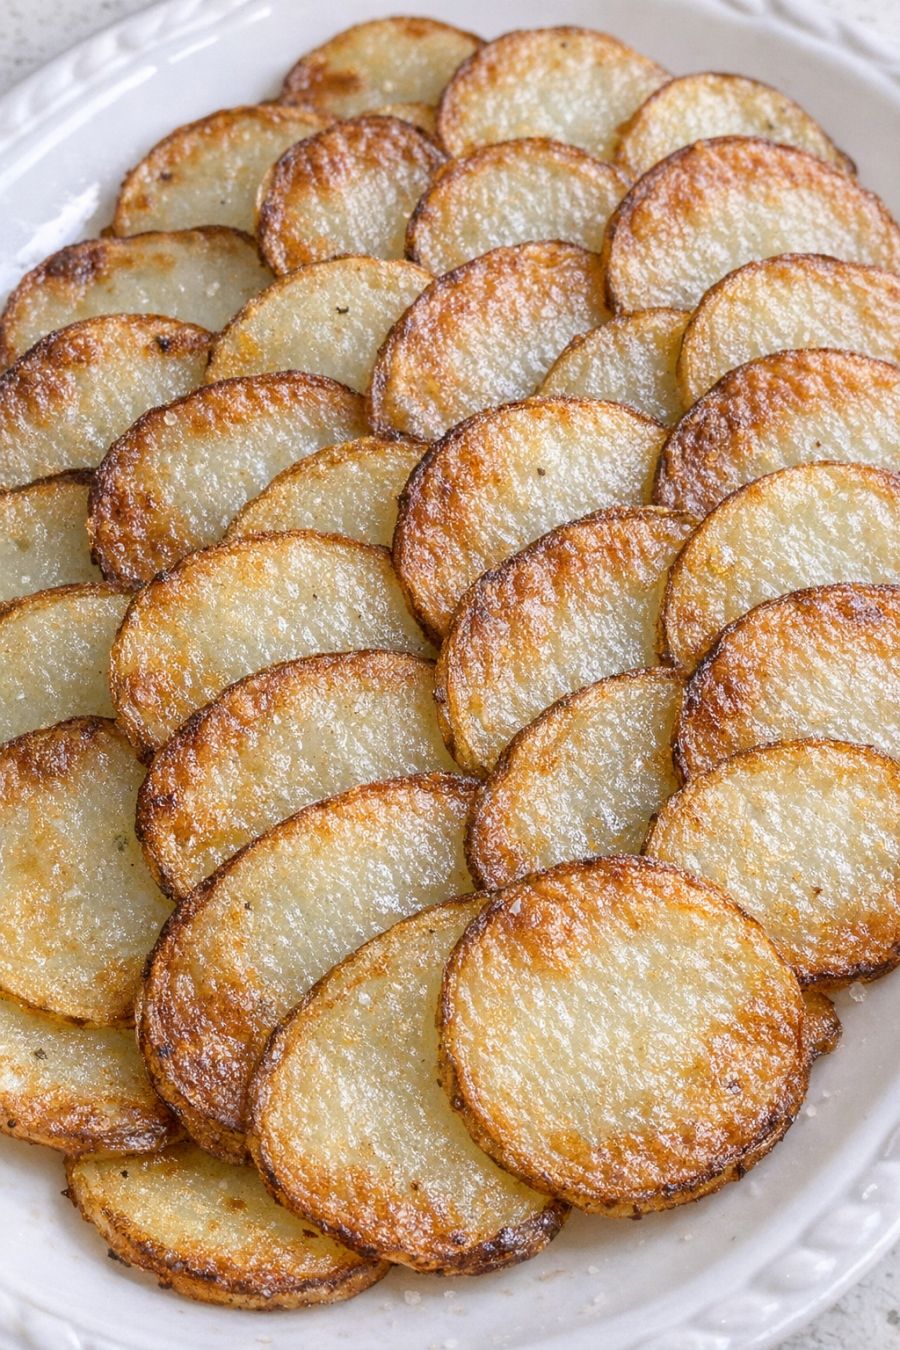
These Oven-Baked 3-Ingredient Potato Snowflakes are my mother-in-law’s signature holiday side—she literally served a big platter of them at every Thanksgiving and Christmas for forty years. When she turned eighty, I finally sat down with her in the kitchen and watched her make them, measuring everything as she went. They’re whisper-thin potato rounds baked until the edges turn golden and lacy, then layered on a simple white platter so they look like overlapping snowflakes. With just potatoes, butter, and salt, they’re budget-friendly, easy enough for a busy weeknight, and special enough for a holiday table.
Serve these potato snowflakes hot, right on the platter you baked them on or transferred to a simple white serving dish so the golden edges really stand out. They’re perfect alongside roast chicken, turkey, or ham, and they also work as a fun, fancy-feeling “potato chip” with cocktails or sparkling wine. I like to put out a small bowl of sour cream or plain Greek yogurt on the side, plus a green salad or roasted vegetables to balance the richness. If you’re hosting, you can bake them just before guests arrive and keep them in a warm oven for 5–10 minutes so they stay crisp for the meal.
Oven-Baked 3-Ingredient Potato Snowflakes
Servings: 4
Ingredients
2 large russet potatoes (about 1 1/2 pounds total)
3 tablespoons unsalted butter, melted
1 teaspoon fine sea salt, plus more to taste
Directions
Preheat your oven to 400°F (200°C). Line 2 large baking sheets with parchment paper. This keeps the potatoes from sticking and makes it easy to slide them onto a serving platter.
Scrub the potatoes well under cold running water and pat them completely dry with a clean kitchen towel. Do not peel them—my mother-in-law swears the thin peel helps the edges crisp and adds flavor.
Using a mandoline set to about 1/16-inch (very thin) or a sharp knife and a steady hand, slice the potatoes into paper-thin rounds. The thinner the slices, the more delicate and “snowflake-like” they’ll bake up.
Spread the potato slices out on a clean kitchen towel or a few layers of paper towels. Gently blot the tops dry to remove surface moisture; dry slices crisp better in the oven.
In a large bowl, toss the potato slices with the melted butter until every slice is lightly coated. Sprinkle with the 1 teaspoon of fine sea salt and toss again so the seasoning is evenly distributed.
Arrange the potato slices on the prepared baking sheets in a single layer, slightly overlapping the edges of the slices so they look like little clusters of petals. Leave a bit of space between clusters so the heat can circulate and the edges can brown.
Bake on the middle rack for 15–20 minutes, rotating the pans halfway through, until the potatoes are turning golden at the edges and lightly blistered in spots. Watch closely toward the end—there’s a fine line between perfectly crisp and too dark.
Once the potatoes are golden and crisp around the edges but still pale in the centers, remove the baking sheets from the oven. Let the potatoes cool on the pans for 3–5 minutes to firm up; they’ll crisp a bit more as they sit.
Carefully slide the parchment with the potato snowflakes onto a white ceramic serving platter, or lift the clusters gently with a thin spatula and arrange them in overlapping layers so they resemble delicate snowflakes. Sprinkle with a pinch more salt if desired.
Serve immediately while warm and crisp. If you need to hold them for a bit, keep the platter in a low oven (around 200°F / 95°C) for up to 10 minutes before serving.
Variations & Tips
For a slightly different flavor while still keeping the spirit of the original, you can swap the russet potatoes for Yukon Golds; they’ll give you a creamier center with equally crisp edges. If you’re okay with bending the strict three-ingredient rule, add a light dusting of freshly ground black pepper or a pinch of garlic powder before baking, or finish with chopped fresh herbs (like parsley or chives) after they come out of the oven. For a make-ahead head start, you can slice the potatoes up to 2 hours in advance and keep them submerged in a large bowl of cold water in the fridge; just be sure to drain and dry them very thoroughly before tossing with butter, or they won’t crisp. If you’re cooking for a crowd, bake in batches and keep finished trays warm in a 200°F (95°C) oven. Food safety tips: Always wash potatoes well to remove dirt before slicing, and handle the mandoline carefully—use the hand guard or a cut-resistant glove to protect your fingers. Don’t leave the finished potatoes at room temperature for more than 2 hours if you’ve served them with dairy-based dips; refrigerate any leftovers promptly and re-crisp in a hot oven for a few minutes before serving again.
