This oven baked 3-ingredient potato butter crisp is the kind of simple, old-fashioned recipe that sticks in a family’s memory. My father-in-law still talks about how his mom made a pan of these every Sunday—thin slices of potato laid out in a baking dish, drenched in butter, and baked until the edges turned caramelized and the centers shattered when you bit in. It’s the perfect busy-week recipe: three basic ingredients, almost no hands-on work, and a nostalgic, comforting side dish that feels a little special even though it’s incredibly easy.
Serve these potato butter crisps straight from the baking dish while they’re still hot and shatteringly crisp around the edges. They’re perfect alongside roast chicken, grilled steak, or a simple pan-seared pork chop. I also love them with a big salad for a lighter dinner, or tucked next to scrambled eggs and fruit for a weekend brunch. Put the baking dish in the center of the table and let everyone scoop their own—the browned, caramelized edge pieces always disappear first.
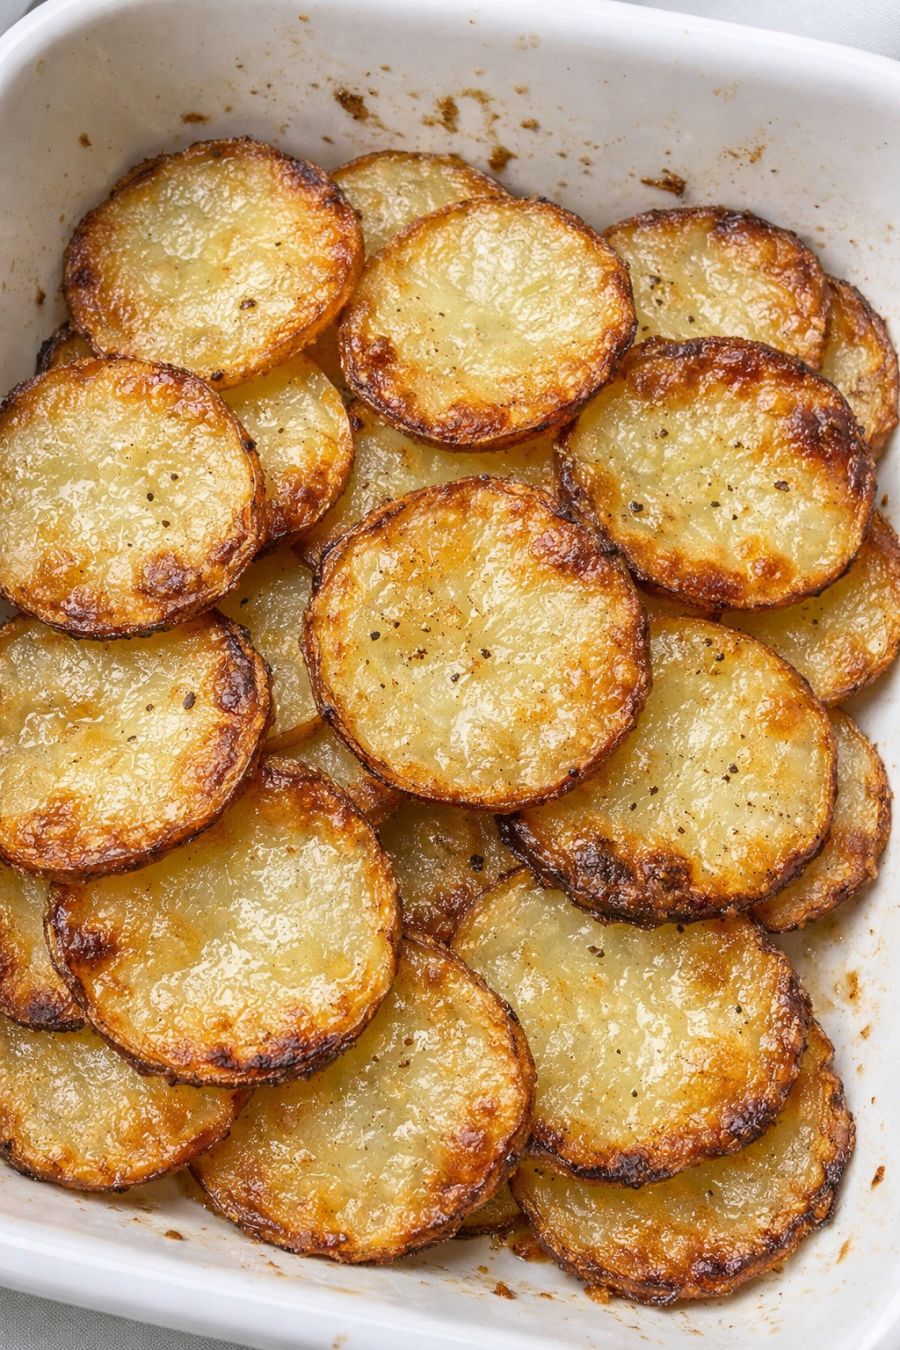
Oven Baked Potato Butter Crisps
Servings: 4
Ingredients
2 pounds russet potatoes, scrubbed (about 4 medium-large potatoes)
6 tablespoons unsalted butter, melted, plus extra for greasing the dish
1 teaspoon fine sea salt (plus more to taste)
Directions
Preheat your oven to 400°F (200°C). Place an oven rack in the middle position so the potatoes cook evenly. Lightly butter a 9x13-inch white ceramic or other oven-safe baking dish, making sure to coat the bottom and corners so the potatoes don’t stick.
Scrub the potatoes well and pat them dry. You can peel them if you prefer a more delicate bite, but leaving the skins on adds a rustic look and a little extra texture. Using a sharp knife or a mandoline, slice the potatoes into thin rounds, about 1/8 inch thick. Try to keep the slices as even as possible so they cook at the same rate.
Spread the potato slices on a clean kitchen towel or paper towels and gently pat them dry. Removing surface moisture helps the butter cling better and encourages those shatteringly crisp, caramelized edges in the oven.
Arrange the potato slices in a single, snug layer in the prepared baking dish. Slightly overlap the rounds like roof shingles, working from one short side of the dish to the other. A bit of overlap is good—it lets the edges crisp while the centers stay tender—but avoid stacking them too thick or they’ll steam instead of crisp.
In a small bowl or measuring cup, melt the butter in the microwave or on the stovetop. Stir in the salt until dissolved. Slowly drizzle the melted butter evenly over the potatoes, taking your time to hit as many slices as you can. Use a pastry brush or the back of a spoon to gently nudge the butter into any dry spots so every round gets at least a light coating.
Cover the baking dish tightly with foil and bake for 20 minutes. This first covered bake lets the potatoes soften through the center without drying out, so you get that tender middle underneath the crisp edges later.
Carefully remove the foil (watch for steam). Return the uncovered dish to the oven and continue baking for 25–35 minutes, until the potatoes are a deep golden brown with caramelized, buttery edges and the centers are tender when pierced with a fork. If your oven runs hot or the edges brown too quickly, you can loosely tent one edge with foil while they finish cooking.
For extra crispness, switch the oven to broil on high for 1–3 minutes at the very end, watching closely. Pull the dish as soon as the tops and edges are evenly golden and just starting to look lacy and crisp—you don’t want them to tip into burnt.
Remove the baking dish from the oven and let the potatoes rest for 5 minutes. This brief rest lets the butter settle so the slices firm up and really shatter when you bite into them instead of falling apart. Taste and sprinkle with a pinch more salt if needed before serving.
Serve the potato butter crisps directly from the white ceramic baking dish while they’re hot. Use a thin spatula to lift out sections or individual rounds, making sure to scoop up any extra browned, buttery bits from the bottom—those are the best part and exactly what my father-in-law still remembers from his mom’s Sunday dinners.
Variations & Tips
To keep this true to its three-ingredient spirit, any add-ins are optional, but a few tweaks can fit different tastes or schedules. For a slightly richer flavor, use salted butter and reduce or omit the added salt, tasting at the end and adjusting. If you want a hint of herbiness without complicating things, sprinkle a small pinch of dried thyme or rosemary over the potatoes along with the salt before baking. For extra crispness, you can reduce the butter to 4 tablespoons and lightly mist the tops of the potatoes with neutral oil spray right before the uncovered bake; this encourages browning while keeping the ingredient list simple. If you’re cooking ahead, you can slice and arrange the potatoes in the dish a few hours in advance, cover tightly with plastic wrap, and refrigerate. When you’re ready to bake, pat off any moisture that has pooled on top, then proceed with the melted butter and salt. Food safety tips: Always refrigerate leftover potatoes within 2 hours of baking, storing them in a shallow, covered container. Reheat leftovers thoroughly in a 375°F (190°C) oven until hot and sizzling at the edges; avoid leaving cooked potatoes at room temperature for extended periods, as this can encourage bacterial growth. When using a mandoline for slicing, use the hand guard or a cut-resistant glove to protect your fingers, and keep the blade out of reach of children.
