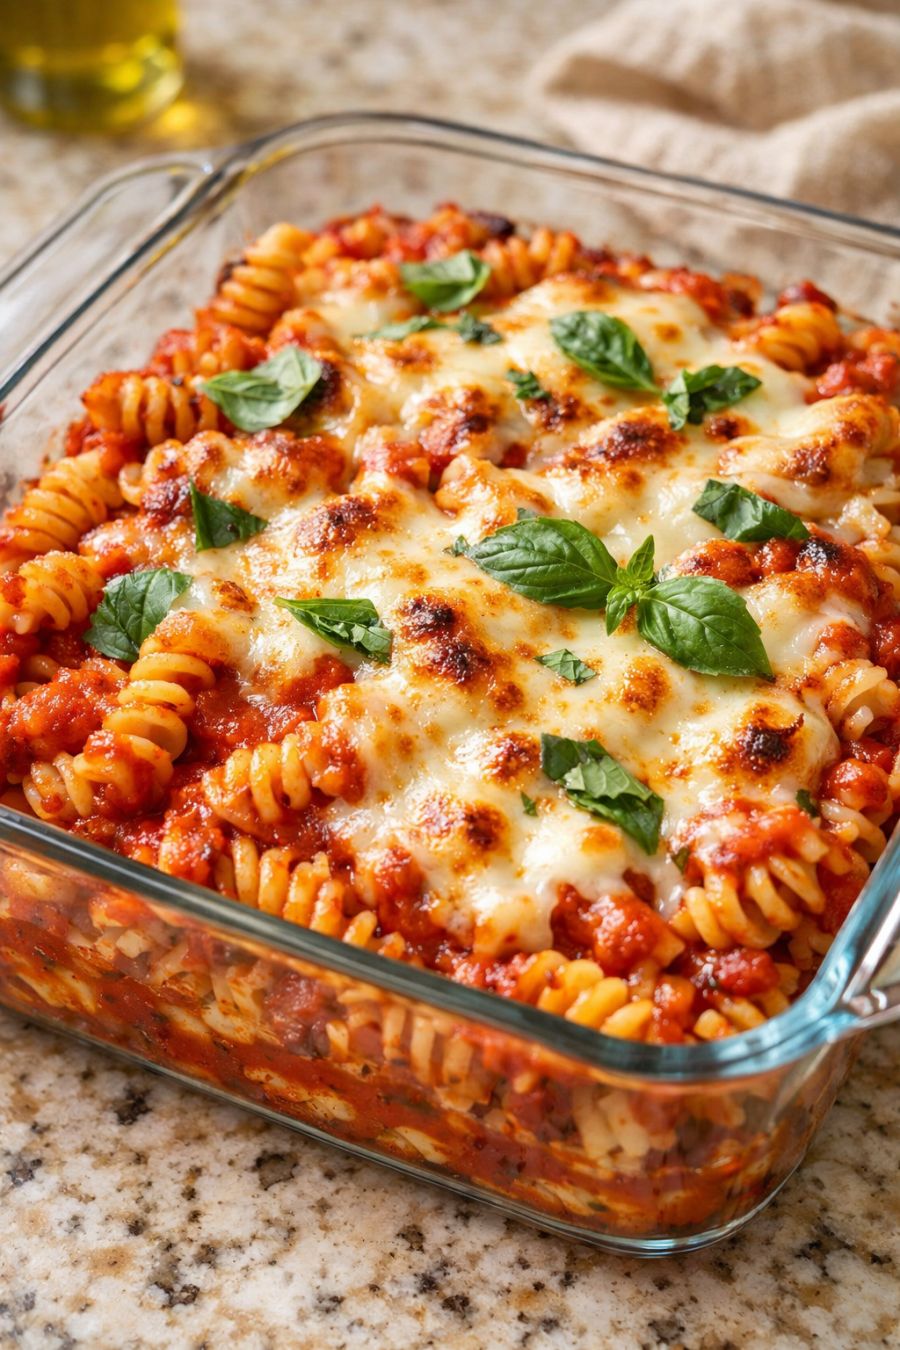
This 5-ingredient oven rotini is exactly what I reach for on those nights when work runs late, the kids are starving, and I still want something that tastes like I actually tried. You literally dump dry rotini straight into a 9x13 glass baking dish, add four pantry-friendly ingredients, and let the oven do the work. No boiling pasta, no fancy steps—just a cozy, cheesy, saucy bake that feels like a hug in casserole form and will have your husband (and everyone else at the table) going back for seconds.
Serve this oven rotini hot straight from the baking dish with a simple green salad (bagged salad totally counts) and some garlic bread or buttered toast to soak up the extra sauce. A side of steamed broccoli or green beans balances the richness nicely. If you like a little heat, pass red pepper flakes at the table, and for a touch of freshness, sprinkle on chopped fresh parsley or basil right before serving.
5-Ingredient Oven Rotini
Servings: 6
Ingredients
12 ounces dry rotini pasta
3 cups jarred marinara or pasta sauce
3 cups water
2 cups shredded mozzarella cheese, divided
1/2 cup grated Parmesan cheese
Directions
Preheat your oven to 400°F (200°C). Grab a 9x13 glass baking dish—the kind you’d use for brownies or lasagna.
Pour the dry rotini pasta evenly into the bottom of the 9x13 glass baking dish. Spread it out so it’s in a fairly even layer; this is your base and should look like that top-down shot of dry pasta in the dish.
In a large measuring cup or bowl, whisk together the jarred marinara sauce and the water until well combined. This extra liquid is what lets the pasta cook right in the oven, no boiling needed.
Pour the sauce-and-water mixture evenly over the dry rotini in the baking dish. Use a spoon to gently press down and stir just enough so that most of the pasta is submerged in the liquid. It’s okay if a few pieces are peeking out.
Sprinkle 1 1/2 cups of the shredded mozzarella cheese evenly over the top of the saucy pasta. Reserve the remaining 1/2 cup of mozzarella for later.
Sprinkle the grated Parmesan cheese evenly over the mozzarella layer. This will help create a golden, slightly crispy, cheesy top.
Cover the baking dish tightly with aluminum foil, making sure it’s sealed around the edges so the steam stays in and cooks the pasta.
Bake, covered, in the preheated oven for 30 minutes. This gives the rotini time to soften and absorb the sauce and water.
Carefully remove the foil (watch out for hot steam), then stir the pasta gently to make sure everything is cooking evenly and not sticking to the bottom. If it looks a little dry at the edges, stir those saucy center bits out toward the sides.
Sprinkle the remaining 1/2 cup shredded mozzarella over the top of the pasta. Return the dish to the oven, uncovered, and bake for another 10–15 minutes, or until the pasta is tender when you taste a piece and the cheese on top is melted and lightly golden.
Let the baked rotini rest for about 5–10 minutes before serving. This helps the sauce thicken slightly and makes it easier to scoop neat portions. Serve straight from the dish and enjoy the cheesy, saucy goodness.
Variations & Tips
You can easily tweak this 5-ingredient base to fit your family’s tastes and what you have on hand. For extra protein, scatter 1–2 cups of cooked Italian sausage, rotisserie chicken, or browned ground beef over the dry pasta before adding the sauce mixture (this doesn’t change the core 5-ingredient method, but is a great add-on when you have time). If you like a little kick, stir 1/2 teaspoon red pepper flakes into the sauce and water mixture. To sneak in veggies, add a layer of chopped fresh spinach, thawed frozen peas, or sliced mushrooms over the dry rotini before pouring on the liquid—just keep the overall volume similar so the pasta still cooks evenly. You can swap mozzarella for an Italian blend cheese, or use pecorino instead of Parmesan for a saltier bite. If you prefer a creamier bake, replace 1/2 cup of the water with heavy cream or half-and-half. For make-ahead, you can assemble the dish up to the point of adding cheese on top, cover, and refrigerate for up to 8 hours; when baking from cold, add 5–10 extra minutes before uncovering and finishing with the final cheese. Food safety tips: Always make sure any meat you add is fully cooked before it goes into the casserole, since this recipe’s timing is designed to cook pasta, not raw protein. Use a clean spoon each time you taste-test the pasta for doneness to avoid cross-contamination. Leftovers should be cooled within 2 hours, stored in an airtight container in the refrigerator, and eaten within 3–4 days; reheat thoroughly until steaming hot in the center before serving.
