
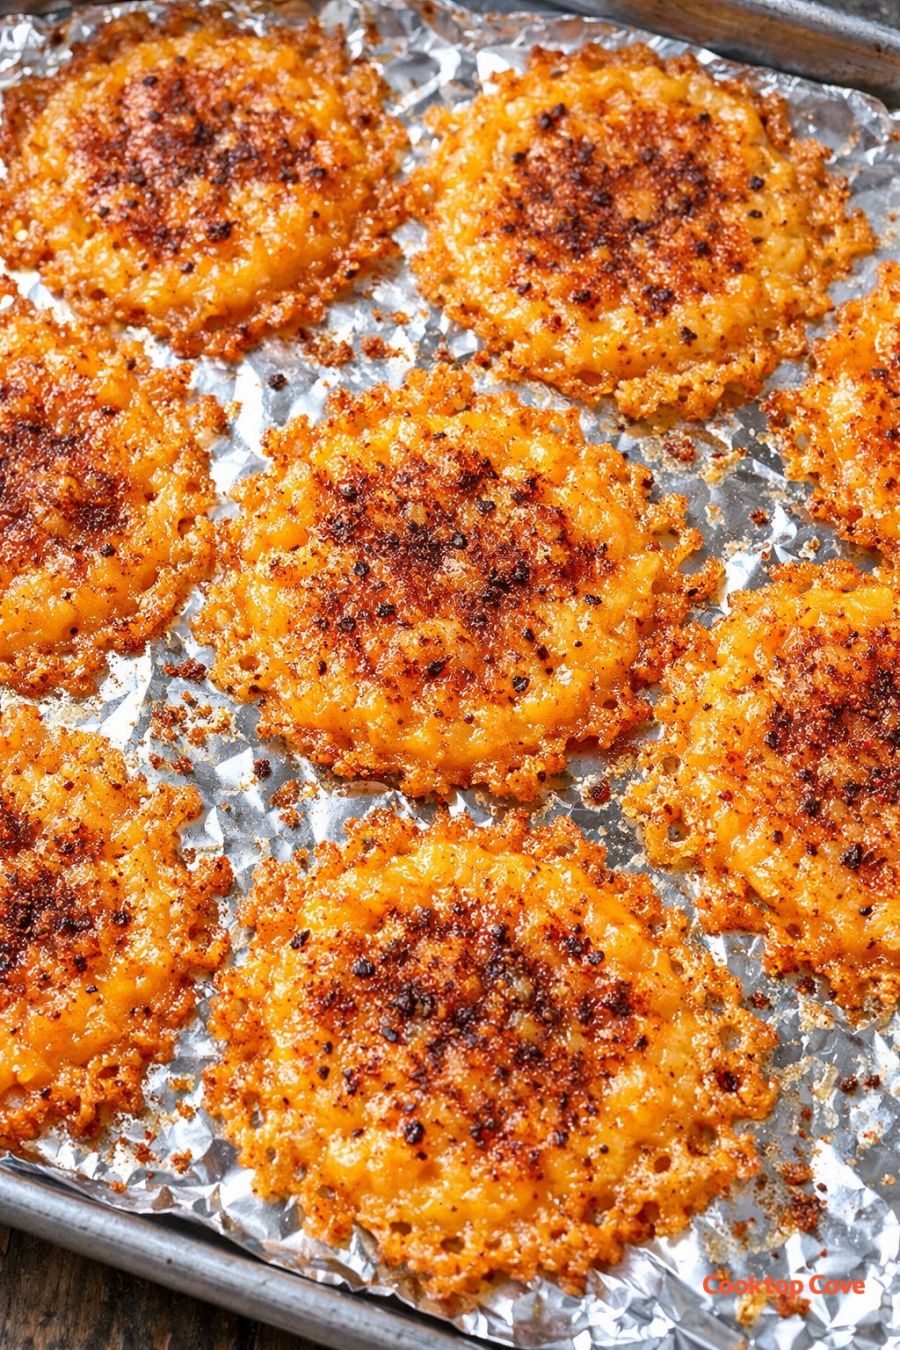
These low carb 4-ingredient taco cheese crisps are my go-to party snack, inspired by the simple crunchy bites my Nana always brought to weekend get-togethers. She loved recipes that were easy enough to throw together while chatting on the phone, but special enough that the grandkids would hover by the table waiting for the tray to cool. These bake up into bubbly, golden-orange rounds of cheddar with lacy, crispy edges and a warm taco kick—honestly better than anything you’d grab from a drive-thru. They’re perfect when you want something salty, cheesy, and snacky without a lot of fuss or carbs.
Serve these taco cheese crisps right on the foil-lined baking sheet or transfer them to a big platter once they’ve cooled and firmed up. They’re great on their own as a crunchy snack, or you can set out small bowls of sour cream, salsa, or guacamole for dipping. I like to tuck them next to a simple veggie tray—cucumber slices, bell pepper strips, and cherry tomatoes—for a colorful party spread. They also work as a fun low-carb “chip” alongside taco salad or chili on a casual family night. If you’re packing them for a gathering, let them cool completely, then layer between parchment in a container so they stay crisp.
Low Carb Taco Cheese Crisps
Servings: 4
Ingredients
2 cups shredded cheddar cheese (packed, about 8 oz)
1 tablespoon taco seasoning (store-bought or homemade, low sugar if possible)
1/4 teaspoon garlic powder
1 pinch crushed red pepper flakes (or more to taste)
Directions
Preheat your oven to 375°F (190°C). Line a large baking sheet completely with aluminum foil, smoothing out any big wrinkles so the crisps bake evenly and release easily.
In a medium bowl, toss together the shredded cheddar cheese, taco seasoning, garlic powder, and crushed red pepper flakes until the cheese is evenly coated with the spices. This is where all that pretty red and brown color comes from.
Using a tablespoon or small cookie scoop, drop small mounds of the seasoned cheese onto the foil-lined baking sheet, leaving at least 2 inches between each mound. Aim for about 1 packed tablespoon of cheese per crisp so they stay bite-sized and crunchy.
Gently pat each mound down with your fingers or the back of the spoon into a flat, even circle about 2 inches wide. Don’t worry if they look a little shaggy around the edges—that’s what gives you those lacy, crispy borders once they bake.
Place the baking sheet on the middle rack and bake for 7–10 minutes, watching closely toward the end. The cheese should melt, bubble, and spread into rounds with deep golden-orange edges and a slightly darker, toasty ring around the outside. If they’re still pale in the center, give them another minute or two.
Remove the pan from the oven and let the crisps cool on the foil for at least 5–10 minutes. They will firm up as they cool, going from soft and stretchy to crisp and snappy. Don’t try to move them too soon or they may tear.
Once cooled and set, gently peel each crisp off the foil with your fingers or a thin spatula. Serve right away for the best crunch, or let them cool completely before storing. To store, layer the crisps between sheets of parchment paper in an airtight container at room temperature for up to 2 days.
Variations & Tips
For milder palates or picky eaters, cut the taco seasoning in half and skip the crushed red pepper flakes; you can always serve a mild salsa on the side for anyone who wants extra flavor. If your family likes things extra spicy, add a pinch of cayenne or use a hot taco seasoning blend. You can also swap part of the cheddar for pepper jack or Colby Jack to change up the flavor while keeping the same easy method. For mini nacho-style bites, press a few finely chopped pickled jalapeños or black olives into the tops of the cheese mounds before baking, keeping pieces small so the crisps still hold together. To make them more uniform, trace circles on the underside of your foil using a glass, then flip the foil and use the outlines as a guide for shaping the cheese. Food safety and success tips: Use pre-shredded cheese straight from the fridge or freshly shredded cheese that’s been chilled; very soft, warm cheese can puddle too much. Keep an eye on the crisps during the last few minutes of baking, as cheese can go from perfectly toasty to burnt quickly. Always let the crisps cool until firm before stacking or storing so they don’t steam and soften. Store at room temperature in a dry spot—refrigeration can make them chewy. If you’re cooking with kids, remind them that melted cheese and foil stay hot for a while; have them help with mixing and spacing the cheese, then let an adult handle the oven.
